Why Photos of Paintings Look Wrong (and How Professionals Fix It)
Most artists have had this experience: you photograph a finished painting, look at the image on your phone or computer, and something is off. The colors are slightly different from the original. There's a streak of glare across the surface. One side looks brighter than the other. The brushwork that gives the painting its presence seems to have disappeared. The photograph looks like a photograph of a painting — not like the painting itself.
This isn't a problem with your camera, or not primarily. Photographing flat artwork accurately is genuinely difficult, and there are unique challenges specific to photographing paintings that don't apply to most other photographic subjects. Understanding what goes wrong — and why — helps explain why professional artwork digitization exists and when it makes a difference.
The Most Common Problems When Photographing Paintings
Photographs of paintings look different from the original for a consistent set of reasons — each rooted in the physical and optical properties of paint, canvas, and light. The list below summarizes the most common problems, what they look like in practice, and why they happen.
- Glare and reflections — bright streaks or patches obscuring part of the image. Why: varnish, glossy paint, or canvas texture reflects light directly into the lens.
- Uneven lighting — one side of the painting appears lighter or darker. Why: light sources are not perfectly balanced across the full surface.
- Perspective distortion — rectangular artwork appears trapezoidal or slightly warped. Why: camera angle, lens distortion, or imperfect alignment with the artwork plane.
- Color shifts — the photo looks warmer, cooler, or slightly different in hue. Why: incorrect lighting color temperature and lack of white balance.
- Flattened surface texture — brushstrokes and paint layers appear less visible or dimensional. Why: flat, even lighting suppresses the shadows that make surface relief visible.
- Lack of detail — soft areas that lack sharpness. Why: lens issues such as poor focus, not enough depth of field, or using a lens not suited to a flat subject, so the corners are soft.
- Colors not right when printing — colors that don't match the original. Why: lack of calibration or color management.
Glare and Reflections
Glare is the most immediately visible problem in artwork photography, and one of the most difficult to fully eliminate. Most paintings have at least some reflective quality — varnished surfaces are obvious, but even unvarnished oil and acrylic paint reflects light, and canvas texture creates a complex surface of small peaks and valleys that scatter light in multiple directions.
When a light source strikes the surface of a painting at the wrong angle relative to the camera, portions of that light reflect directly into the lens. The result can be bright streaks, patches, or a hazy bloom that obscures the underlying color and detail. Moving the lights to a steeper or shallower angle often shifts the glare rather than eliminating it — particularly on large paintings where the geometry changes across the surface.
Polarizing filters can reduce glare in photography, but they only work at certain angles, introduce their own color and tonal changes, and don't eliminate the problem entirely on highly reflective or textured surfaces. The most reliable solution is a lighting system with enough angular control to manage reflections across the full surface of the work simultaneously.
Uneven Lighting
The standard approach to photographing flat artwork is to place two light sources on either side of the painting at 45-degree angles. When it works, this produces even illumination across the surface. In practice, achieving perfect balance is harder than it sounds — the lights must be positioned at exactly the same distance and angle, the room must be free of other light sources, and the lights themselves must have identical output and color temperature. Any deviation produces one side that reads slightly lighter or darker than the other.
On large paintings, especially when photographed in small spaces, the problem is compounded by the physics of light falloff: the center of the painting is effectively closer to both light sources than the edges, which receive light at a shallower angle and lower intensity. The result is a gradient of brightness across the surface that may be subtle on screen but becomes visible in print or when the file is used for reproduction.
Uneven lighting is particularly consequential for paintings with large areas of a single color — a flat sky, an expanse of ground, a monochrome background — where the gradient becomes much easier to see than in a complex, varied composition.
Often the task of making sure the lighting is an even exposure across the work competes with the need for custom lighting control: deciding how diffuse or how contrasty the light should be to reproduce the work in its best manner. It's very challenging to get both perfect.
Perspective Distortion and Lens Geometry
Every photographic lens introduces some degree of geometric distortion — a slight bowing, stretching, or compression of the image that is inherent to the optical design. Wide-angle lenses distort more than telephoto lenses. Zoom lenses, which cover a range of focal lengths in a single optical design, often distort more than prime lenses at equivalent focal lengths. The wide-range zooms most people own — 24–105mm or 18–55mm — tend to be among the worst for artwork capture.
On top of lens distortion, the camera itself must be precisely parallel to the painting. If the camera is tilted even slightly — upward, downward, or to either side — the resulting photograph will show the painting as a trapezoid rather than a rectangle. The edges that are further from the camera appear shorter than those that are closer. This is straightforward perspective geometry, and it applies to any flat subject photographed from an angle.
Editing software provides some tools for perspective distortion and lens correction, but the correction involves stretching or compressing parts of the image, which degrades sharpness and introduces its own artifacts. A corrected image will never be quite as accurate as one that was captured without distortion in the first place. For reproduction and archival purposes, geometric accuracy in the original capture is always preferable to software correction after the fact.
Many popular lenses focus in a curved plane, equidistant from the lens. This may result in the corners of a work being soft and out of focus while the center is properly focused. This may be solved with more depth of field, which requires more light, or ideally with a dedicated lens that has a flat field of focus.
Color Shifts and White Balance
Paintings are extraordinarily demanding subjects for color accuracy. Artists put tremendous care into subtle color relationships — the warmth in a shadow, the coolness of a highlight, the way one hue shifts in proximity to another. These relationships are what give a painting its particular quality. A photograph that misrepresents them, even slightly, produces an image that feels wrong in ways that are hard to articulate but immediately apparent to anyone familiar with the original.
The central challenge is white balance. The human eye corrects automatically for variations in the color temperature of different light sources — tungsten bulbs, daylight, fluorescent tubes, and LED panels all appear roughly neutral to a viewer who has adapted to them. A camera sensor does not adapt in the same way. Without careful white balance calibration, the camera records the color cast of the light source rather than the colors of the painting.
Even with correct white balance, different light sources emit different spectral profiles — the specific wavelengths of light they produce. A painting illuminated by daylight and the same painting illuminated by an LED panel calibrated to the same color temperature may still render differently because the spectral distribution of the two sources is not the same. The physics of light and color are complex, and the experience of color always has three elements that are all variable:
- The light
- The object
- The viewer (or sensor)
Color only exists with all three, and it will be different if any one thing changes. Two objects may appear the same color under one lighting condition, but in another they will present as two very different values. The nerdy term for this phenomenon is metamerism. It may sound like a problem, but metamerism is essential to how we are able to perceive color. These challenges are one of the reasons that professional artwork digitization uses carefully characterized light sources alongside color management software.
Surface Texture and Brushwork
The surface of a painting is not flat. Even a smooth, thinly painted work has microscopic texture from the ground, the canvas weave, and the paint film itself. A heavily worked painting — with impasto passages, palette knife marks, layered glazes, or raised brushstrokes — is a genuinely three-dimensional object, and capturing it accurately requires lighting that reveals that dimensionality.
The challenge is that the same lighting conditions that minimize glare also tend to flatten texture. Even, diffuse light — which reduces reflections and provides uniform illumination across the surface — suppresses the small shadows that make surface relief visible. Directional light, which reveals texture by casting shadows across peaks and ridges in the paint surface, can increase glare. Balancing these competing requirements is one of the core technical problems in artwork photography, and it's a problem that camera-based setups cannot fully solve. The practical result is that photographs of textured paintings often look smoother and more mechanical than the originals — or, when lit to reveal texture, the contrast, exposure, and shadows are uneven across the surface.
Why Even a Great Camera Struggles with Paintings
A common assumption is that a better camera will solve the problems described above. It won't — not reliably, and not for the reasons that matter most for artwork documentation.
Modern cameras are extraordinarily capable instruments. A current professional mirrorless camera captures extraordinary detail, handles a wide dynamic range, and produces reasonably large files for print. While professional artwork documentation can require higher resolution than most cameras can capture, resolution is not the most common shortcoming.
For portraits, landscapes, reportage, and most photographic subjects, camera quality is rarely the limiting factor anymore. Artwork documentation is different. The most common limiting factors for painting photography are the geometry of the lighting setup, the color calibration of the light source and camera combination, the alignment of the camera to the artwork plane, and the management of reflections across a surface that may have very different optical properties from area to area. These are workflow and equipment problems, not sensor problems. A higher-resolution camera with the same lighting setup produces a higher-resolution version of the same inaccuracies.
There is also a tonal range issue that is specific to capturing paintings and artwork. Most photographic subjects contain both bright pure-white highlights and solid black shadows — a sky, a face in sunlight and shade, a landscape. No artwork or object is pure black or true white — even the lightest lights and deepest darks contain color and detail. It's a common mistake to treat an artwork as a normal photographic subject. Doing so will likely clip the lightest areas of a painting or lose detail in darker areas. An experienced photographer can compensate for this manually, but it requires specific understanding of the problem.
What Professional Artwork Digitization Does Differently
Professional fine art scanning and artwork digitization systems are designed specifically to address the problems described in this article. They don't simply use better cameras — they use fundamentally different approaches to lighting, geometry, and color management that eliminate most of the variables that make painting photography difficult.
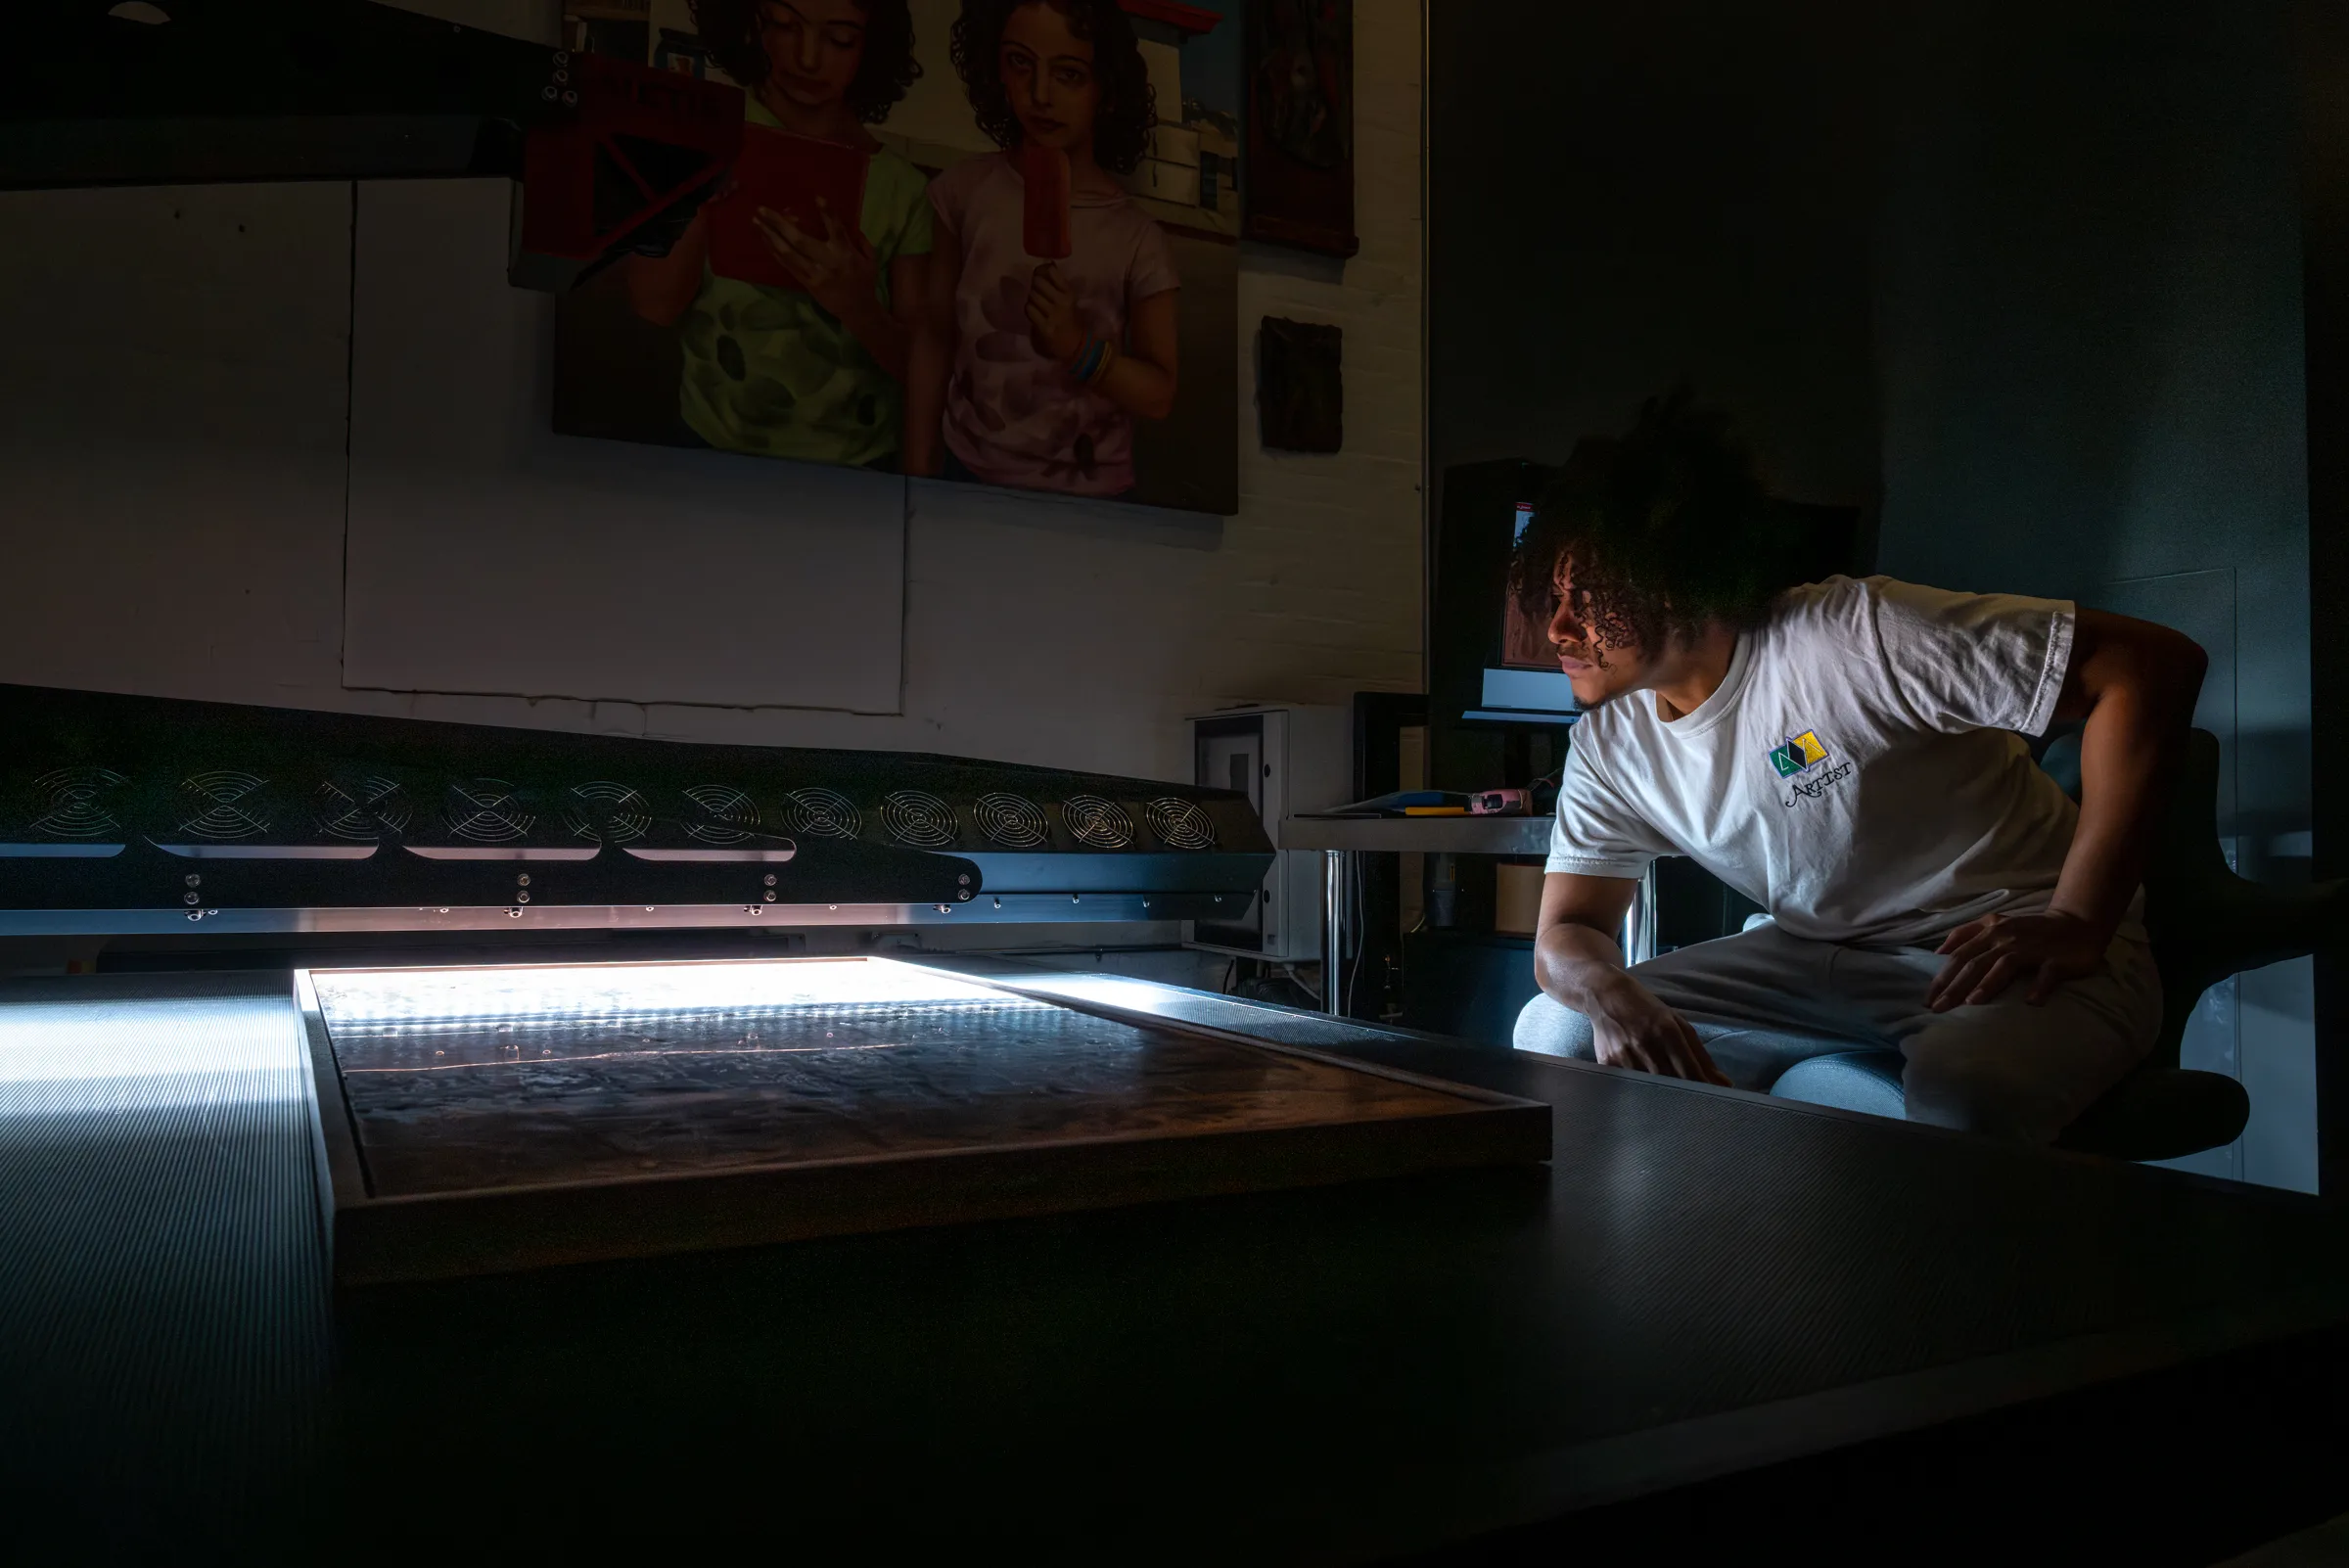
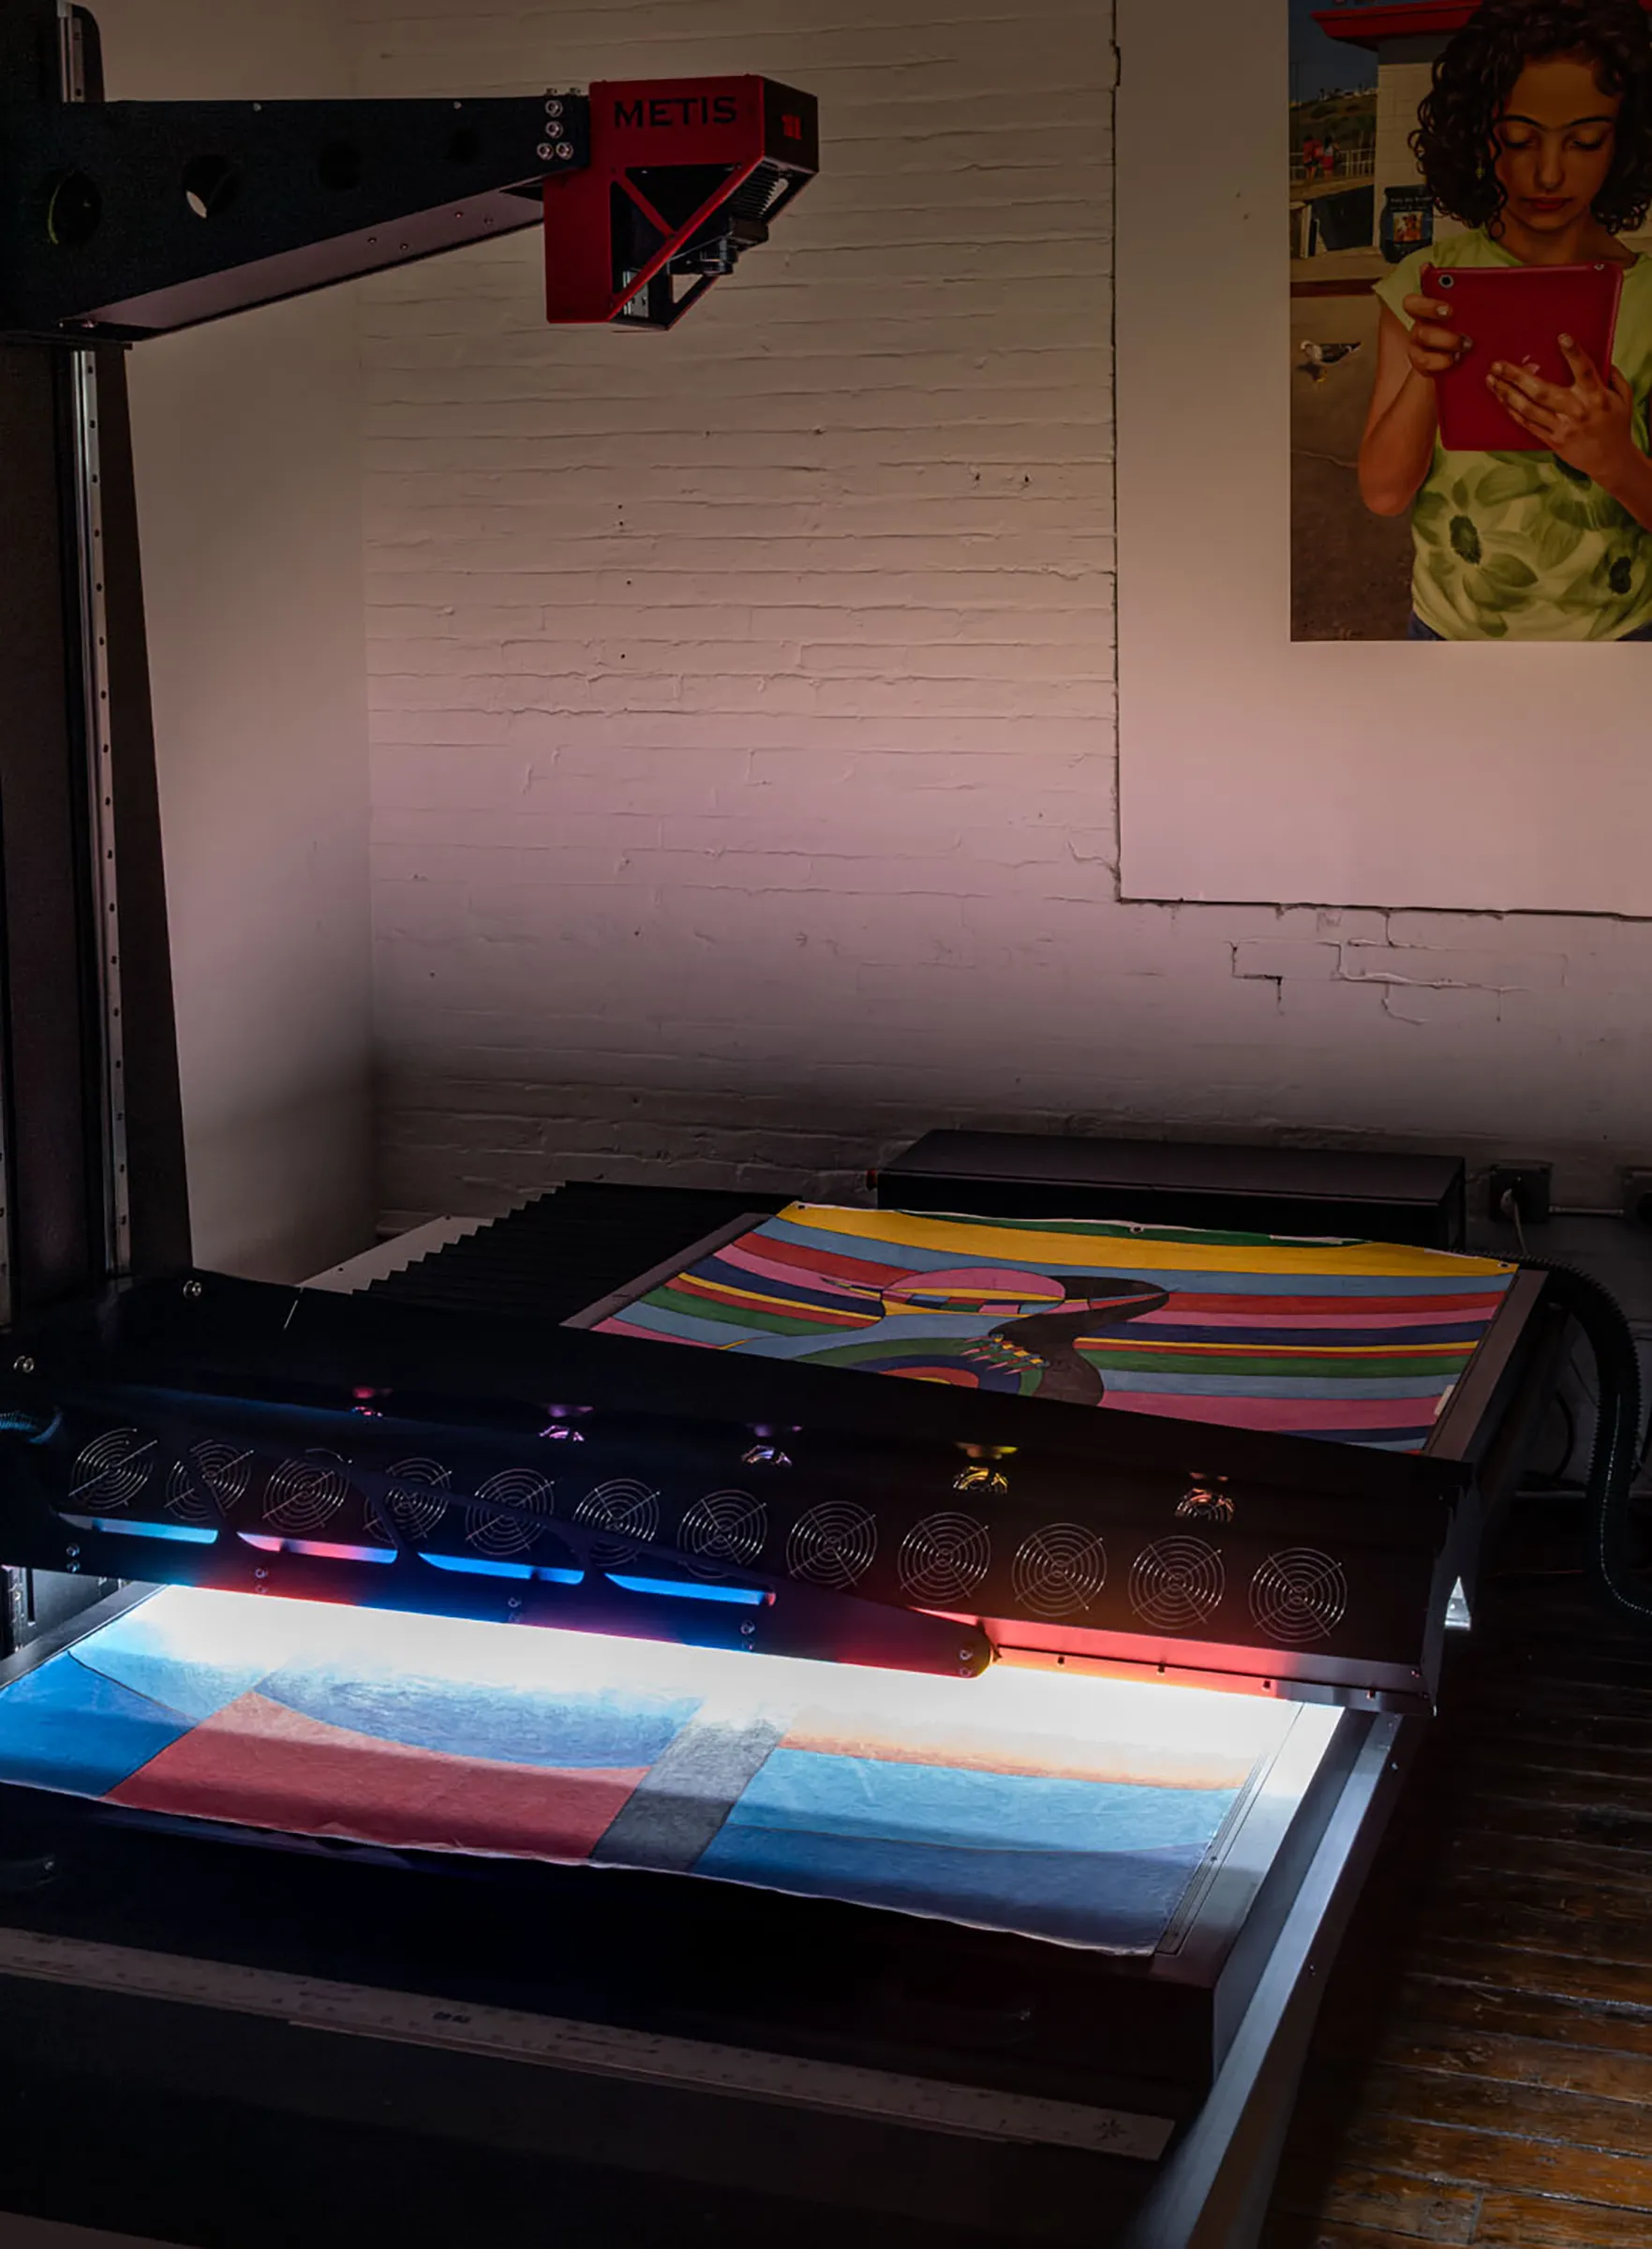
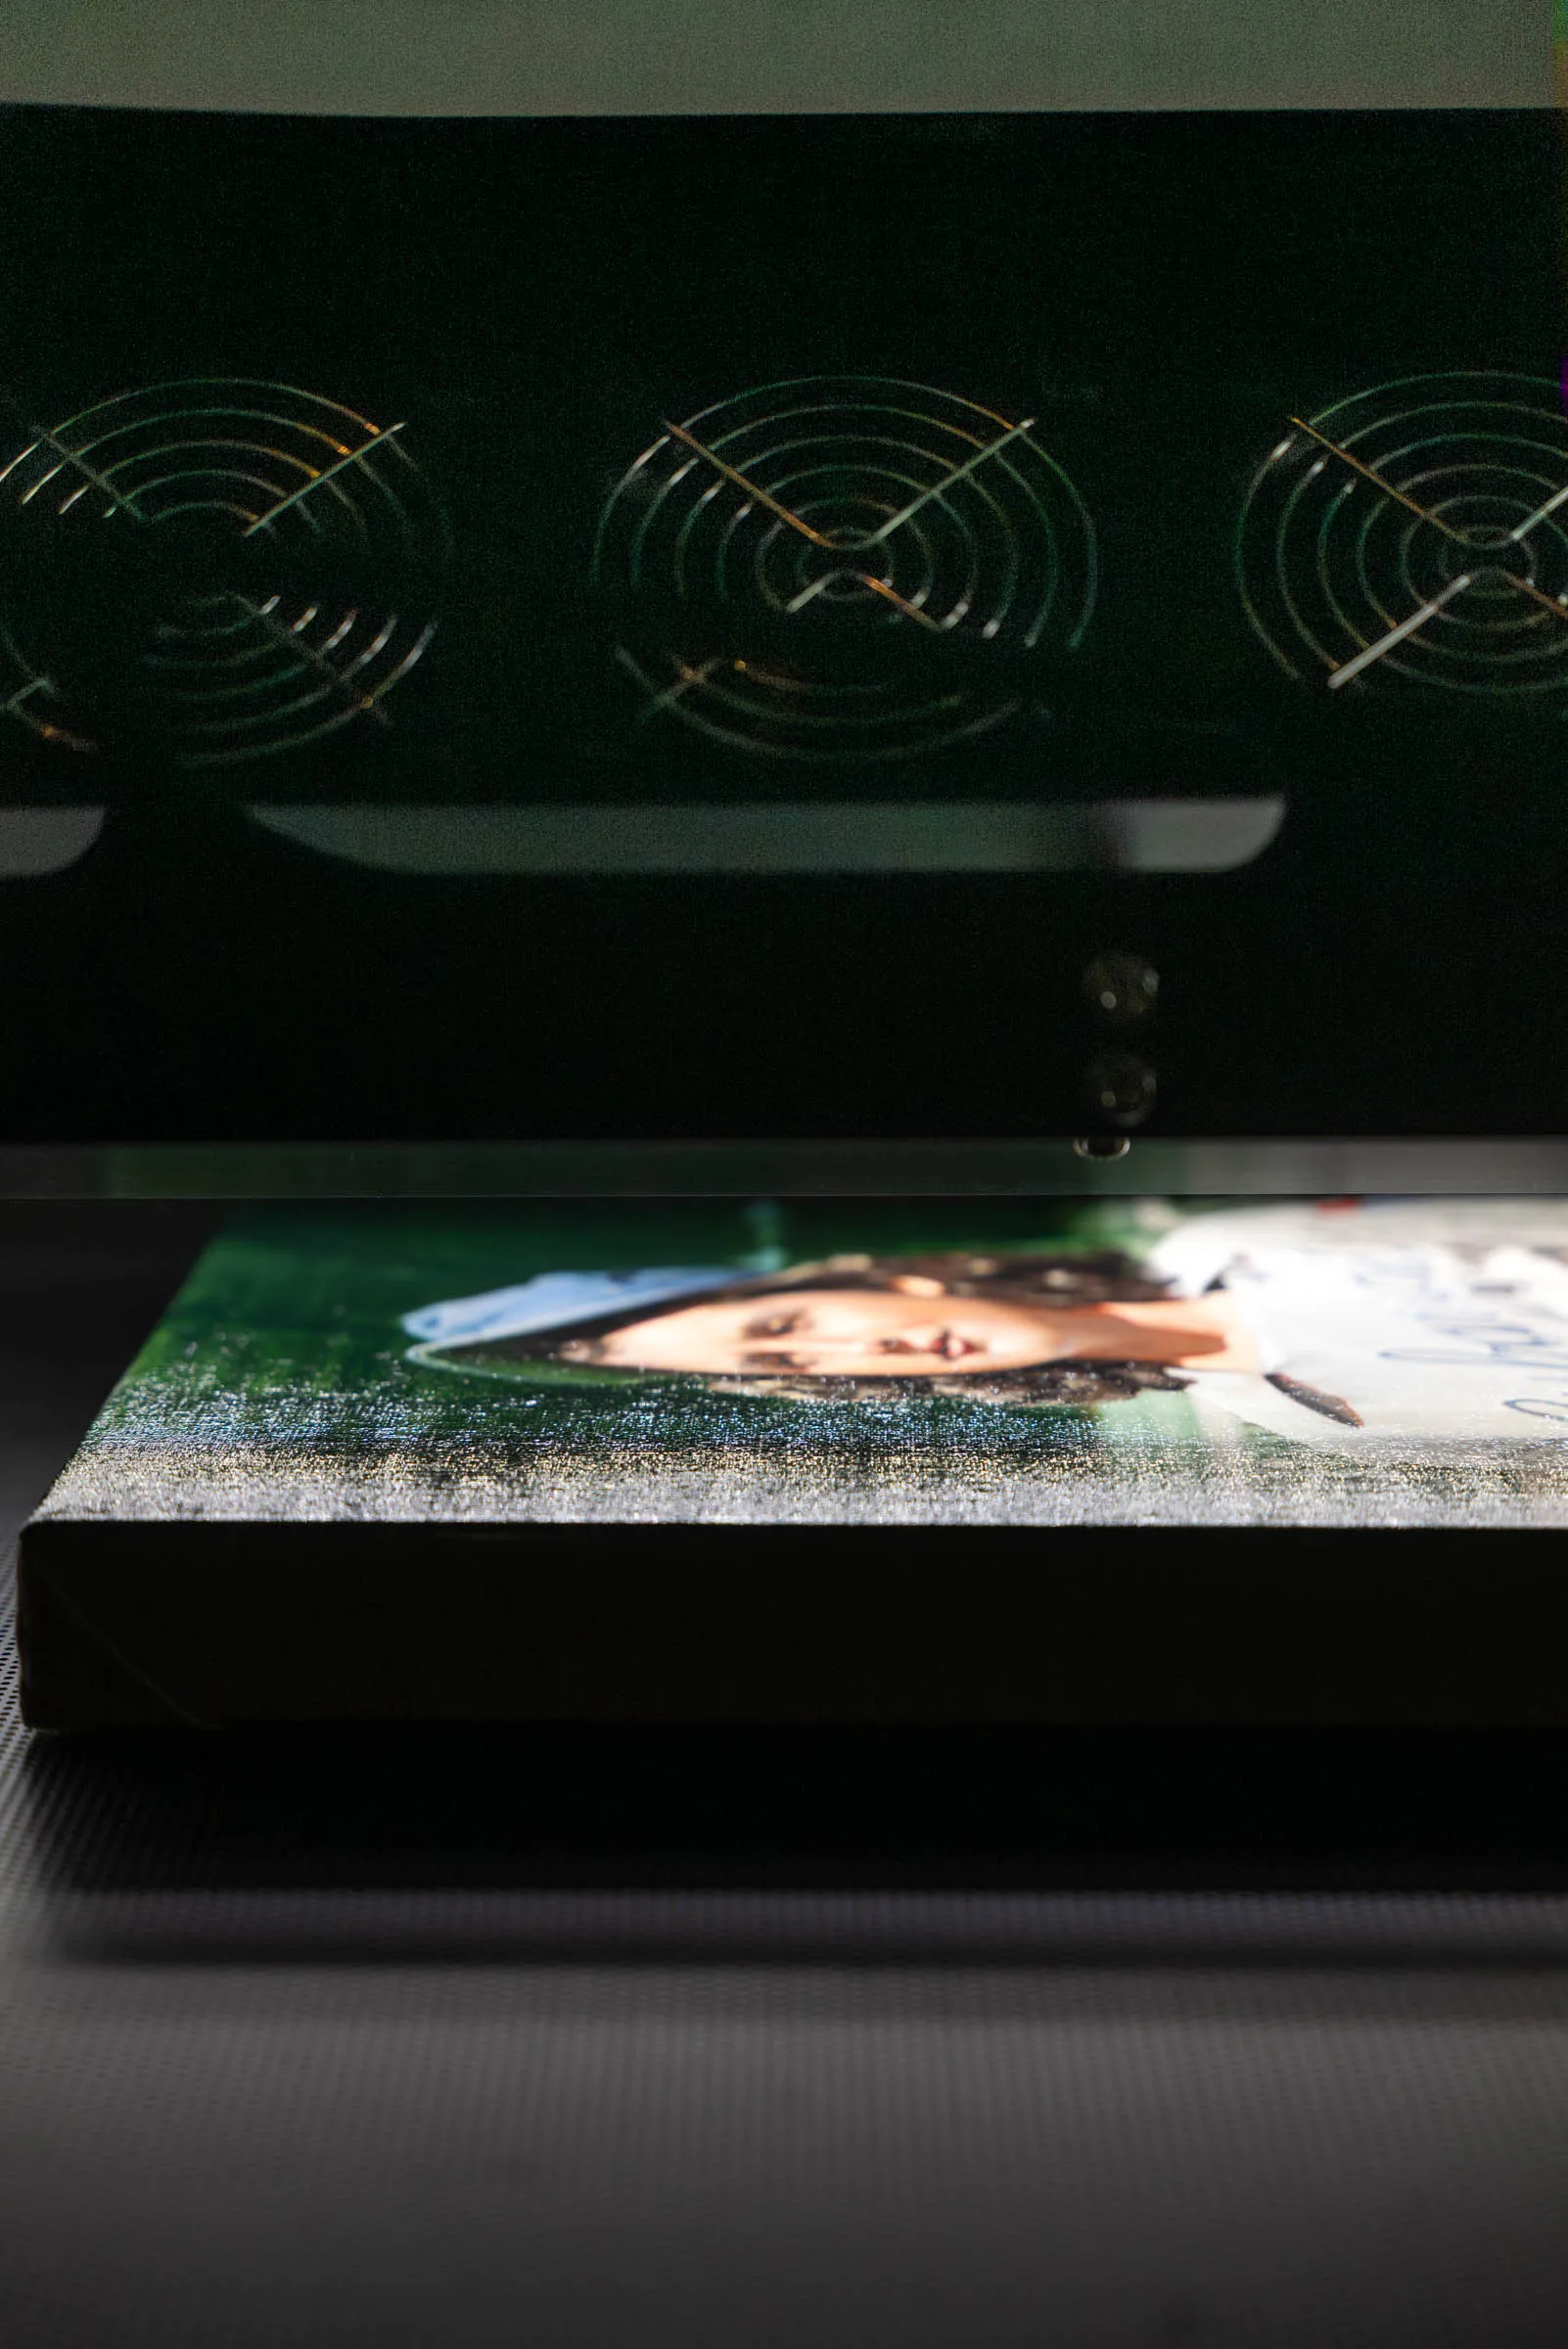
At the highest level, there are two manufacturers whose instruments define what truly professional large-format artwork scanning looks like: Metis and Cruse. Both are used by major museums, national archives, cultural heritage institutions, and specialist fine art studios worldwide. Both use a single high-resolution linear sensor that traverses contact-free above the artwork in a single, precisely registered pass — the architecture that makes everything else in this section possible. Understanding what these systems do differently from camera-based capture, and from lower-tier scanning equipment, explains why they are uniquely equipped for creating the highest-quality captures of artworks.
Many artists do not even know that such an option exists. Professional scanners are huge, complex machines that are mostly used by cultural institutions where there is no public access. Luckily there are enough dedicated fine art studios that provide this service and can solve the many problems of photographing artwork.
Scanning Is a Different Capture Method Than Photography
A scanner captures or records information in a single line of pixels, created sequentially as the sensor moves in relation to the subject, whereas a camera records the whole sensor area visible through the lens at once. The single line of scanning allows precise registration with the synchronized lighting array, so the angle of lighting stays consistent across the whole scan.
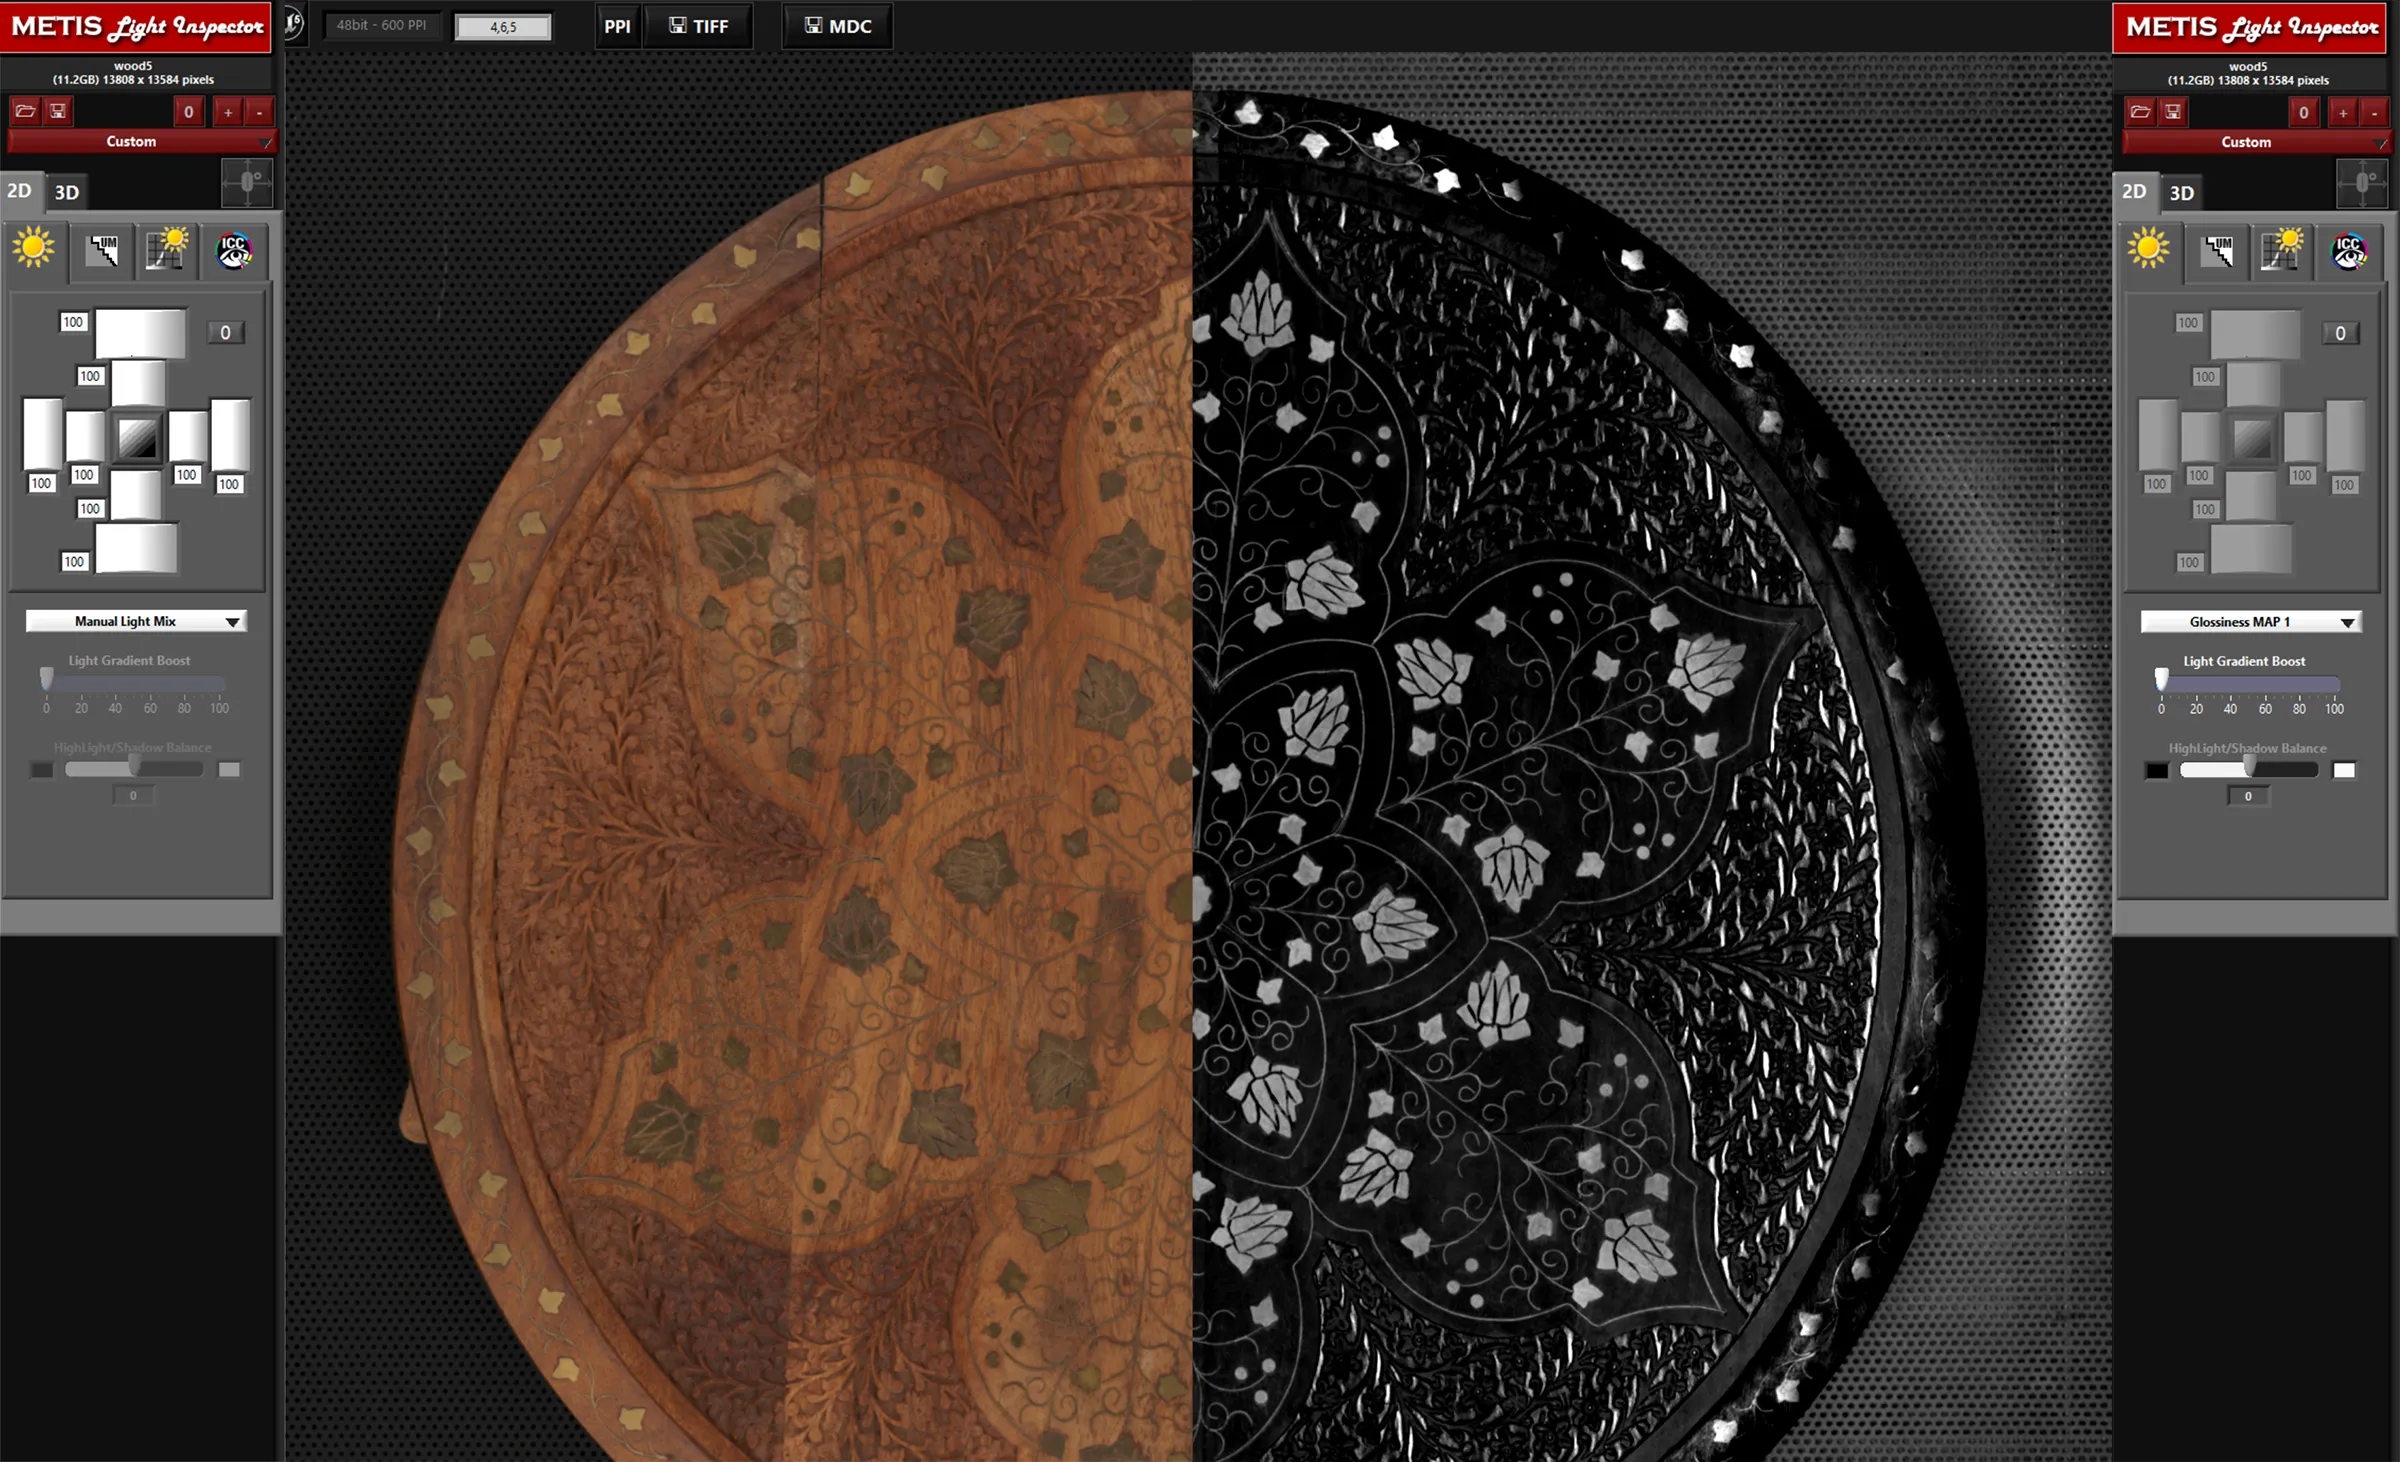
In professional-level scanners this offers significant gains in lighting control and accuracy. This coordinated relationship between lighting and point of capture also allows sophisticated information to be recorded and understood by dedicated software. A professional-level scanner can calculate depth and texture, and even recognize glossiness and output that data.
True Large-Format Scanning vs. Multi-Camera Stitching Systems
Not everything marketed as a 'large-format scanner' works the same way. A category of quality equipment — including systems such as the WideTEK and Versascan — employs multiple line cameras arranged side by side inside the unit, with a glass bed, each capturing a strip of the artwork simultaneously, with the results stitched together in software. These systems have more lighting controls than a consumer scanner and can handle large formats at reasonable cost.
For fine art work, however, the multi-camera architecture introduces some limitations. The first is stitching: joining the outputs of multiple cameras requires alignment software, and the seams between captures — while often invisible on smooth documents — can become apparent on textured surfaces where adjacent cameras render the same surface detail from slightly different angles. The cameras cannot be calibrated independently, leaving subtle color differences in each area. The second, and more consequential for artwork, is depth. A multi-camera system has very limited ability to handle surface variation — raised paint, canvas texture, dimensional mixed media — because each camera captures from a fixed angle, and the parallax difference between adjacent cameras creates inconsistencies across any surface that isn't perfectly flat. The result can be blurring, tonal inconsistency, and misregistration in the stitched file at exactly the passages — impasto, texture, relief — where accuracy matters most.
True professional scanning systems such as the Metis and Cruse use a single sensor traversing the full width of the artwork in one pass. There are no seams, no parallax differences between adjacent capture zones, and no stitching required. The dynamic range of the 16K sensor can hold far more detail in the highlights and the shadows. The entire artwork is captured by the same sensor under consistent lighting conditions from start to finish — which is why these systems handle textured and dimensionally complex surfaces with accuracy that multi-camera systems cannot replicate.
Controlled, Multi-Angle Lighting
Both Metis and Cruse scanning systems use multiple independently controlled light sources that can be varied in angle and intensity across the full surface of the artwork. This allows the operator to find the precise balance between glare reduction and texture revelation for a specific surface — and if needed, to record multiple lighting conditions simultaneously in a single scan file. The visual appearance of the capture can then be adjusted after the fact without bringing the artwork back in.
Geometric Precision
Because a single linear sensor traverses the artwork in a fixed, precisely aligned relationship to the scan surface, there is no lens distortion of the kind produced by photographic lenses, and no geometric inconsistency between sections of the image. The artwork plane and sensor plane are parallel by design throughout the entire capture. The result is a dimensionally accurate file — a painting that is 24 × 36 inches produces a capture that represents those proportions exactly, without correction or adjustment.
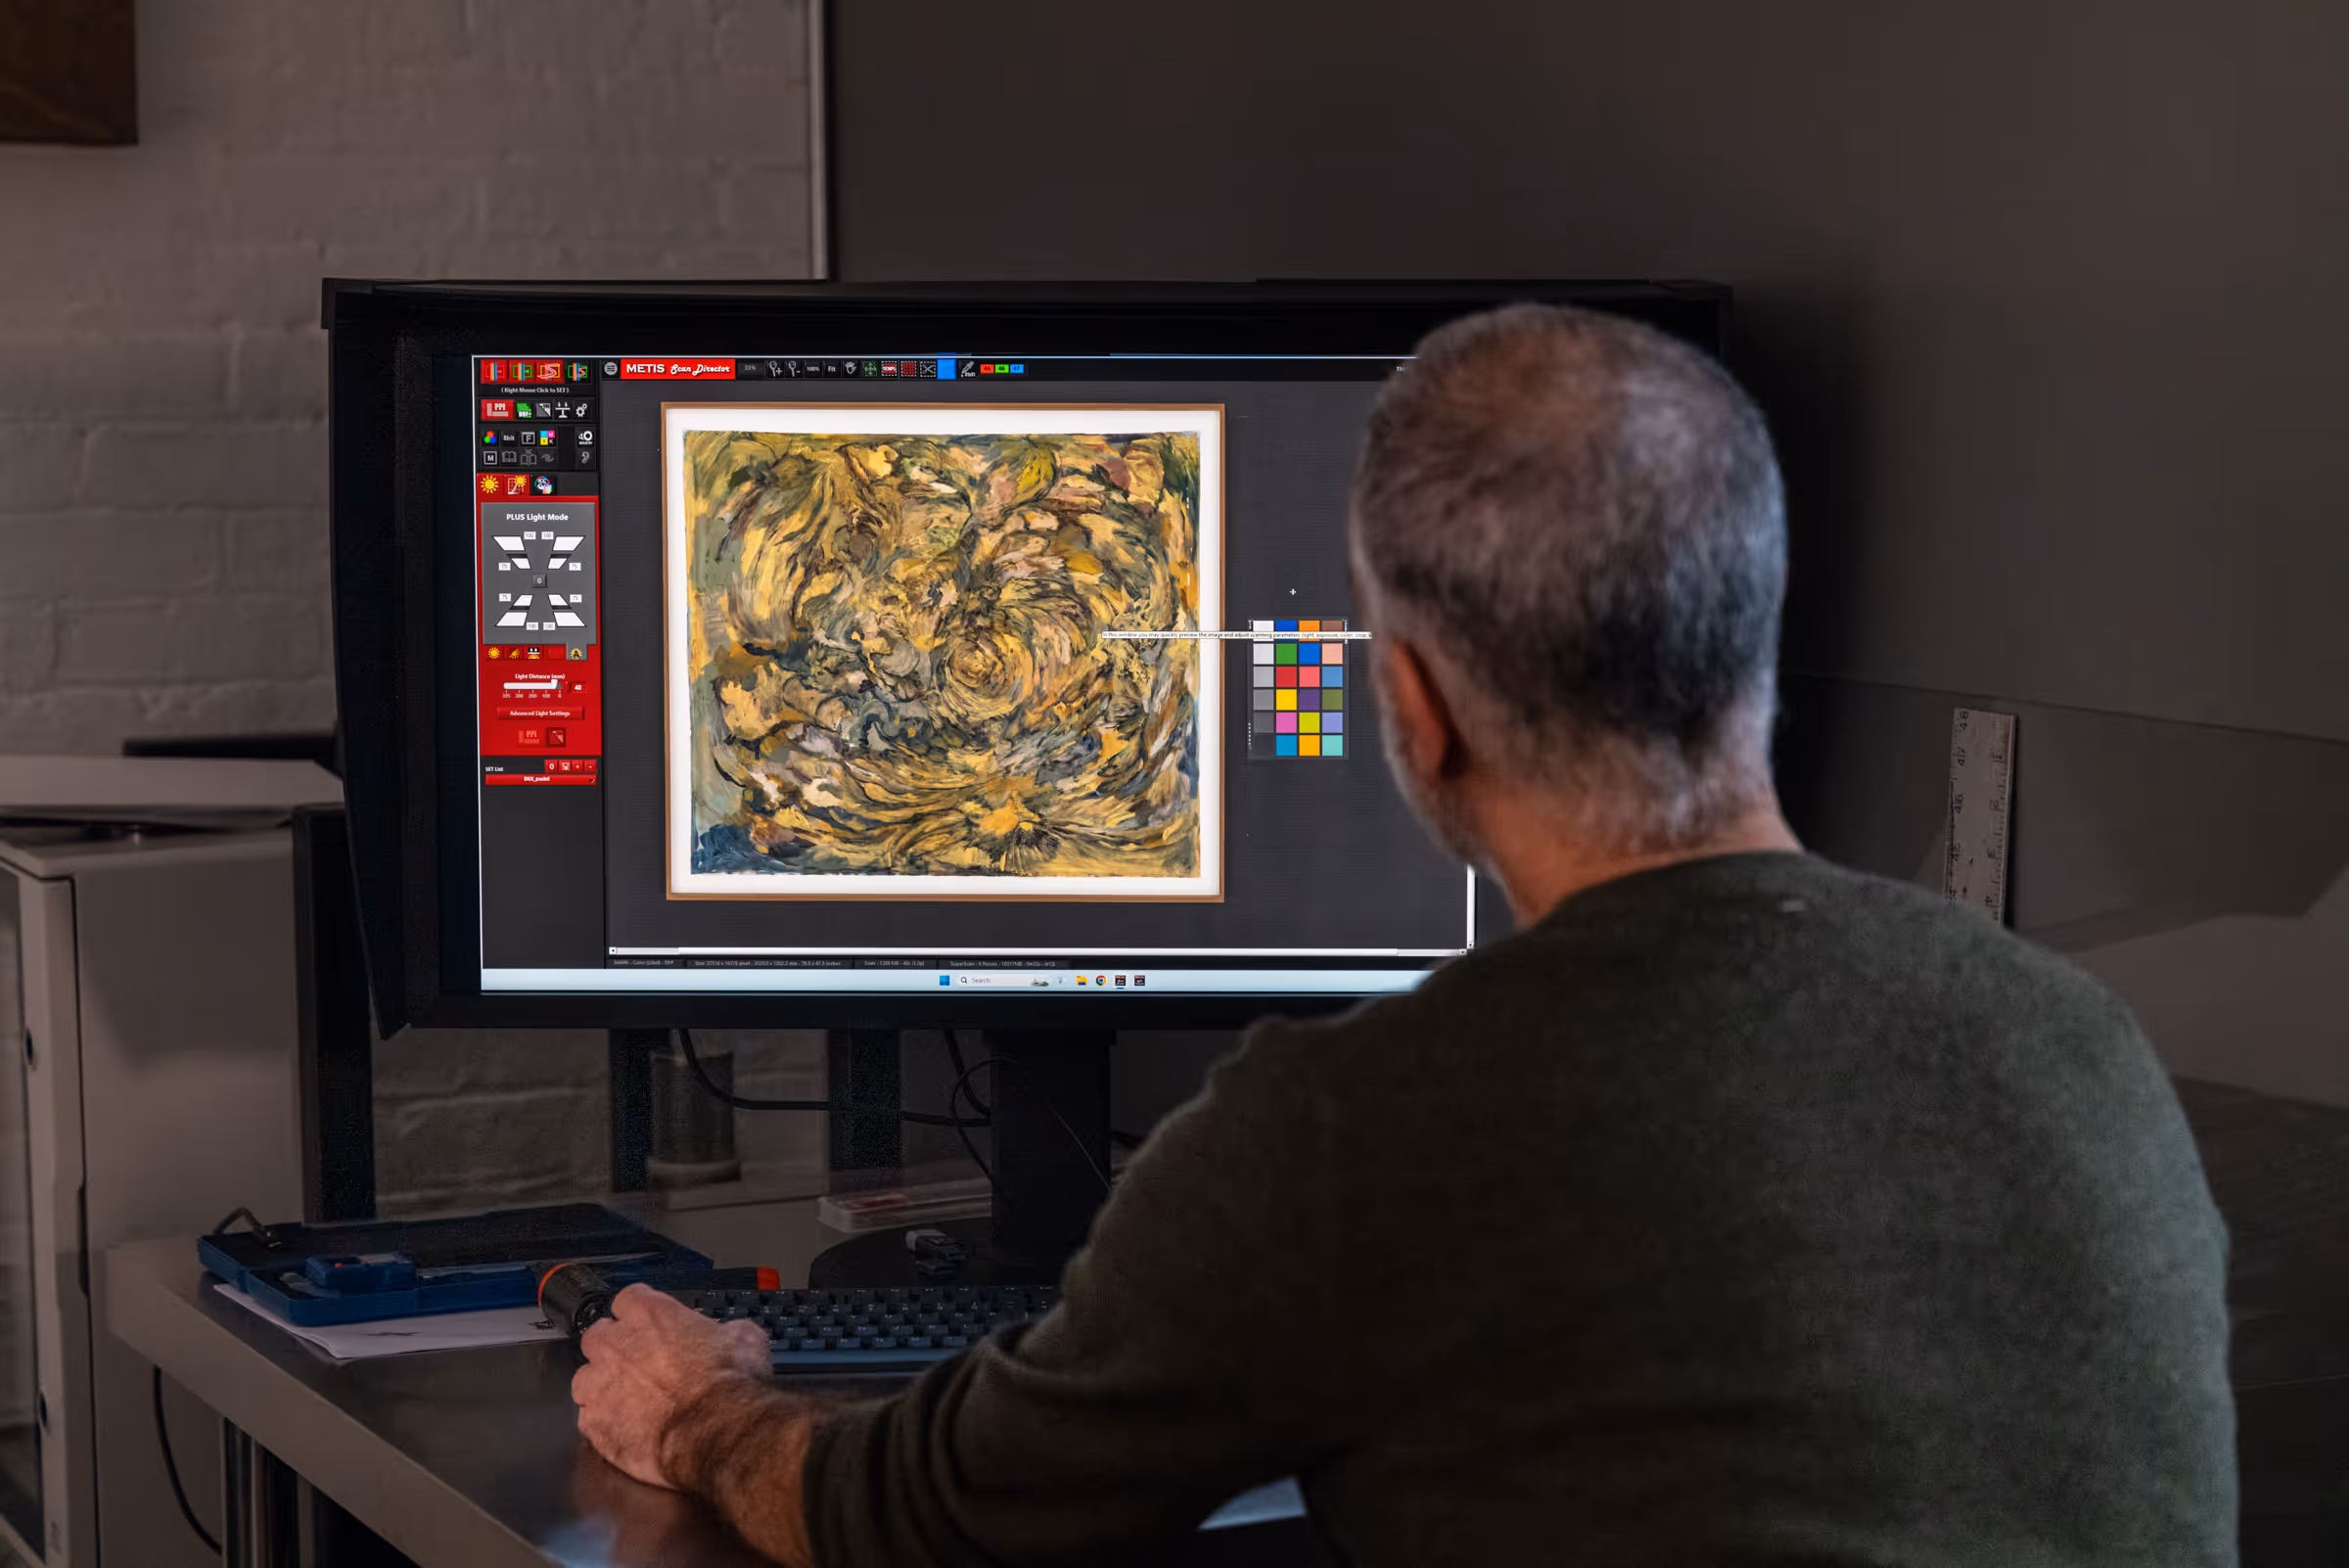
Calibrated Color Management
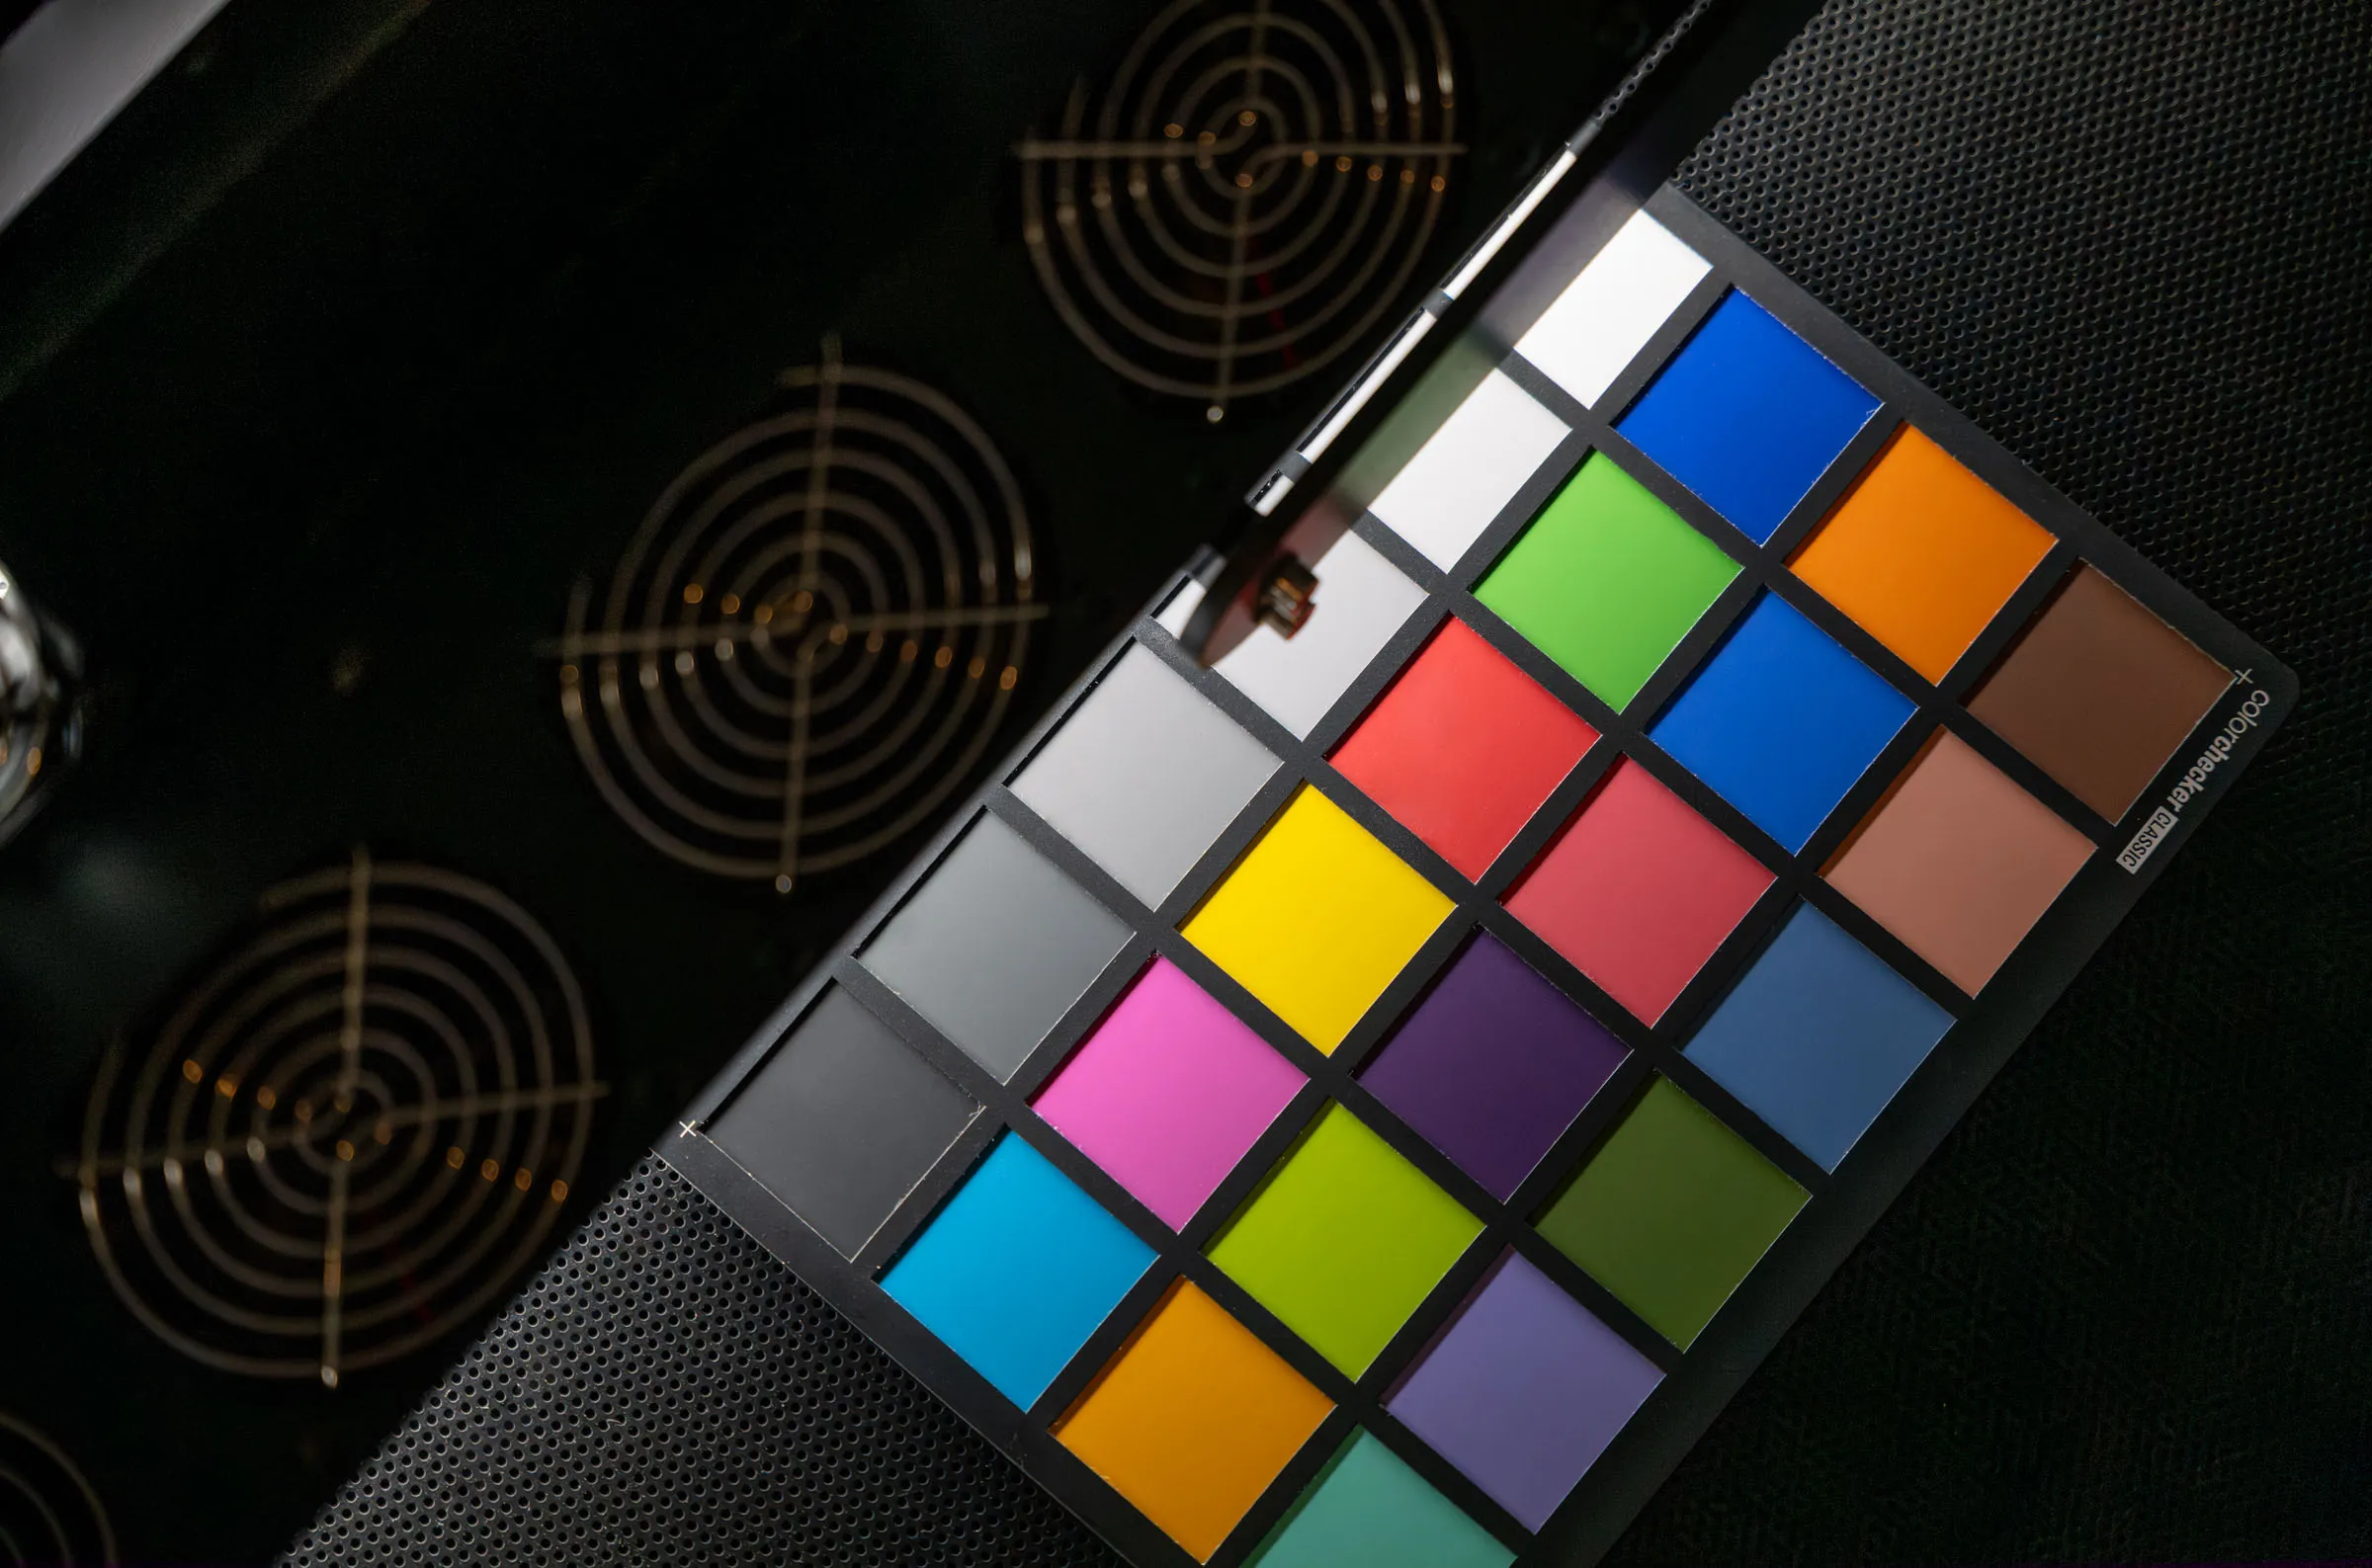
Professional digitization workflows use calibrated, characterized light sources and ICC color profiles built specifically for the scanner and its current state. Color management software — integral to both Metis and Cruse workflows — ensures that the colors in the digital file represent the colors in the original as faithfully as current technology allows, and that those colors will be interpreted consistently by any color-managed output device, from a monitor to a fine art printer.
Surface Capture and Depth of Field
For paintings with significant texture or dimensionality, professional scanning systems capture surface characteristics that no camera-based or multi-camera stitching system can match. Directional lighting control, user-selectable depth of field, and — in Metis instruments — photometric stereo techniques that derive 3D surface data from the scan itself allow these systems to render the physical relief of a painting in the digital file. The texture, depth, and material presence that give a work its character in person are preserved rather than flattened.
Related guide: Fine Art Scanning: Understanding Artwork Digitization — our complete guide covers how professional scanning systems work, what separates them from other capture methods, and what to expect from a professional scanning workflow.
When Professional Digitization Is the Right Choice
Not every artwork needs professional digitization. For quick social media posts, studio documentation, or informal sharing, a careful photograph — or even a phone image — is often adequate. The goal determines the standard.
Professional artwork digitization is worth the investment when:
- The file will be used to produce fine art reproduction or edition prints — where the print must match the original.
- The artwork is being documented for archival or estate purposes — where the record needs to be reliable and long-lasting.
- The image will be published in a book, catalogue, or exhibition materials — where color accuracy and file quality will be scrutinized.
- The painting has significant surface texture, metallic elements, varnish, or other reflective qualities that are difficult to manage with standard lighting.
- The artwork is large — exceeding what can be photographed accurately with a single camera position.
- The file needs to support enlargement beyond the original size for large-format reproduction.
A useful test: if the digital file needs to do work that the original painting does — if it needs to represent the surface, the color, the scale, and the material quality of the work rather than simply documenting that the painting exists — professional digitization is likely the right approach.
Related guide: What Resolution Should Artwork Be Scanned At? — if you're preparing artwork for reproduction or archiving, understanding scan resolution is the next practical step. This guide explains DPI, PPI, and how to choose the right resolution for your specific project.
Frequently Asked Questions
Why do photos of paintings look different from the original?
Paintings present specific challenges that most cameras and lighting setups aren't designed to handle: reflective varnish and paint surfaces create glare; subtle color relationships shift under different lighting temperatures; surface texture is flattened by even, diffuse light; and lens geometry introduces distortion that alters proportions. Any one of these problems can make a photograph feel noticeably different from the original, and in practice they often occur together.
Can you photograph artwork accurately with a camera?
Yes, with care — but it requires calibrated lighting designed for artwork, precise camera alignment to the artwork plane, a suitable lens (typically a prime flat-field lens at a moderate focal length), and a color-managed workflow from capture through delivery. For flat artwork in controlled conditions, an experienced photographer with the right setup can produce high-quality results. The difficulty increases significantly for large paintings, textured surfaces, and varnished or reflective works.
Can you photograph artwork with a phone?
A phone can produce a quick, reasonably attractive image of a painting that works for social media or informal documentation. It won't produce an accurate reproduction. Phone cameras use small sensors, short-focal-length lenses with significant distortion, and aggressive in-camera image processing that adjusts color, contrast, and sharpness automatically. These processes are designed to produce flattering images of general subjects, not accurate records of paintings. For reproduction, publication, or archival use, phone photography is not adequate.
Why does glare appear when photographing paintings?
Glare occurs when light from the source reflects off a smooth or semi-smooth area of the painting surface — varnish, glossy paint layers, or raised canvas texture — at an angle that directs the reflected light toward the camera lens. The problem is geometric: the angle of incidence equals the angle of reflection, and any area of the painting where that geometry aligns with the camera position will produce glare. Moving lights can shift the glare but rarely eliminates it entirely on large or varied surfaces.
Why do colors in a photograph look different from the painting?
Color accuracy in artwork photography depends on light source calibration, camera white balance, and color management. If any of these is off — if the light source has a warm or cool cast, if the camera's white balance is set for the wrong light source, or if there's no ICC color management in the workflow — the colors in the photograph will shift. Paintings are particularly vulnerable to this because they often contain delicate color relationships that become immediately apparent when shifted, even slightly.
Is scanning better than photography for artwork reproduction?
For most flat artwork — paintings, drawings, works on paper, photographs, and mixed media — professional scanning produces more accurate, consistent, and reproducible results than camera-based photography. Scanning systems are purpose-built for flat artwork and designed to eliminate the lighting, geometric, and color management variables that make camera photography difficult. For three-dimensional works, very large installations, or fragile works that can't be moved, camera-based capture may be the only practical option.
Can editing software fix a bad photograph of a painting?
Editing software can correct some problems — color balance, exposure, and minor perspective distortion can all be adjusted in post-processing. But corrections are limited by the information available in the original file. Glare that has burned out detail cannot be recovered; color shifts that have pushed hues outside the camera's recorded range cannot be reversed; texture that was flattened by even lighting cannot be restored. Post-processing improves a mediocre photograph; it doesn't transform it into what a professional capture would have produced.
Professional Artwork Digitization at Brooklyn Editions
At Brooklyn Editions, artwork is digitized using the Metis DRS 2020 — a professional scanning system with a native optical resolution up to 1600 PPI and a scan bed capable of capturing large paintings in a single contactless pass. Every scan project begins with a consultation to discuss the artwork, its dimensions, and the intended use of the files, so that we can recommend the right resolution and workflow before any work begins.
If you're planning to reproduce artwork as prints, create an archival digital record, or produce an edition, our scanning services page has full details on the process, file delivery, and how to get started.