How to Prepare Artwork for Scanning
Preparing original artwork for a professional scan appointment is straightforward, but a little advance thought saves time and ensures the studio can get the best possible result from your work. Most preparation comes down to three things: presenting the work in its best condition ready for the scanner, flagging anything unusual in advance, and arriving with a clear sense of what you need the file to do.
This guide covers everything you need to know before a scan appointment — organized by what to do before you arrive, what to tell the studio in advance, and how different types of artwork require different preparation.
Start With a Consultation
The most important preparation step happens before you do anything physical: talk to the scanning studio before you bring the work in. A consultation — whether by phone, email, or in person — is where the studio asks the questions that determine how your work will be scanned and what the resulting file will be able to do.
A good scanning studio will want to know the dimensions of the work, the medium and any unique surface characteristics, the intended use of the file, and whether there are any condition issues. This conversation shapes the scan setup — the resolution, the lighting configuration, the depth of field, the output format — and it's where you can flag anything that needs special handling rather than discovering it afterwards.
It also gives you the chance to ask the questions that should inform your own preparation: does the work need to be unframed? Is the surface condition likely to be a problem? What file will you receive, and in what format? How long will it take? Getting these answers before the appointment means you arrive prepared and the whole process runs smoothly.
Know What You Need the File to Do
Before your appointment — and before the consultation — it helps to have a clear answer to what the digital file will actually be used for. This determines the resolution the studio will scan at, the color space, and how the file will be prepared for delivery. The right answers differ for different purposes.
- Reproduction printing and editions — the studio needs to know the intended print sizes, since the scan resolution must be sufficient to produce the largest print you'll ever make from this file. If you're planning an edition that might include large-format prints, plan ahead: you can't add resolution to a file after the scan.
- Archival documentation — clarify whether this is a personal archive or a formal institutional record. Institutional archiving may have specific technical requirements for file format, color space, and metadata that the studio needs to accommodate.
- Publication — if the file is destined for a book, catalogue, or editorial use, find out the technical requirements from the publisher before the scan appointment. Required resolution at reproduction size, accepted file formats, and color mode (RGB vs. CMYK) should all be confirmed in advance.
- Multiple uses — if the file might be used for several purposes — prints now, publication later, archival record permanently — tell the studio. The right approach is to scan once at the highest resolution that covers all your likely uses, rather than scanning at the minimum for your current project and needing to rescan later.
When in doubt, scan at higher resolution. A large file can be scaled down for any use. A low-resolution file cannot be improved after the fact. For the full reasoning, see our guide on what resolution artwork should be scanned at.
Physical Preparation: What to Do Before the Appointment
Deframing
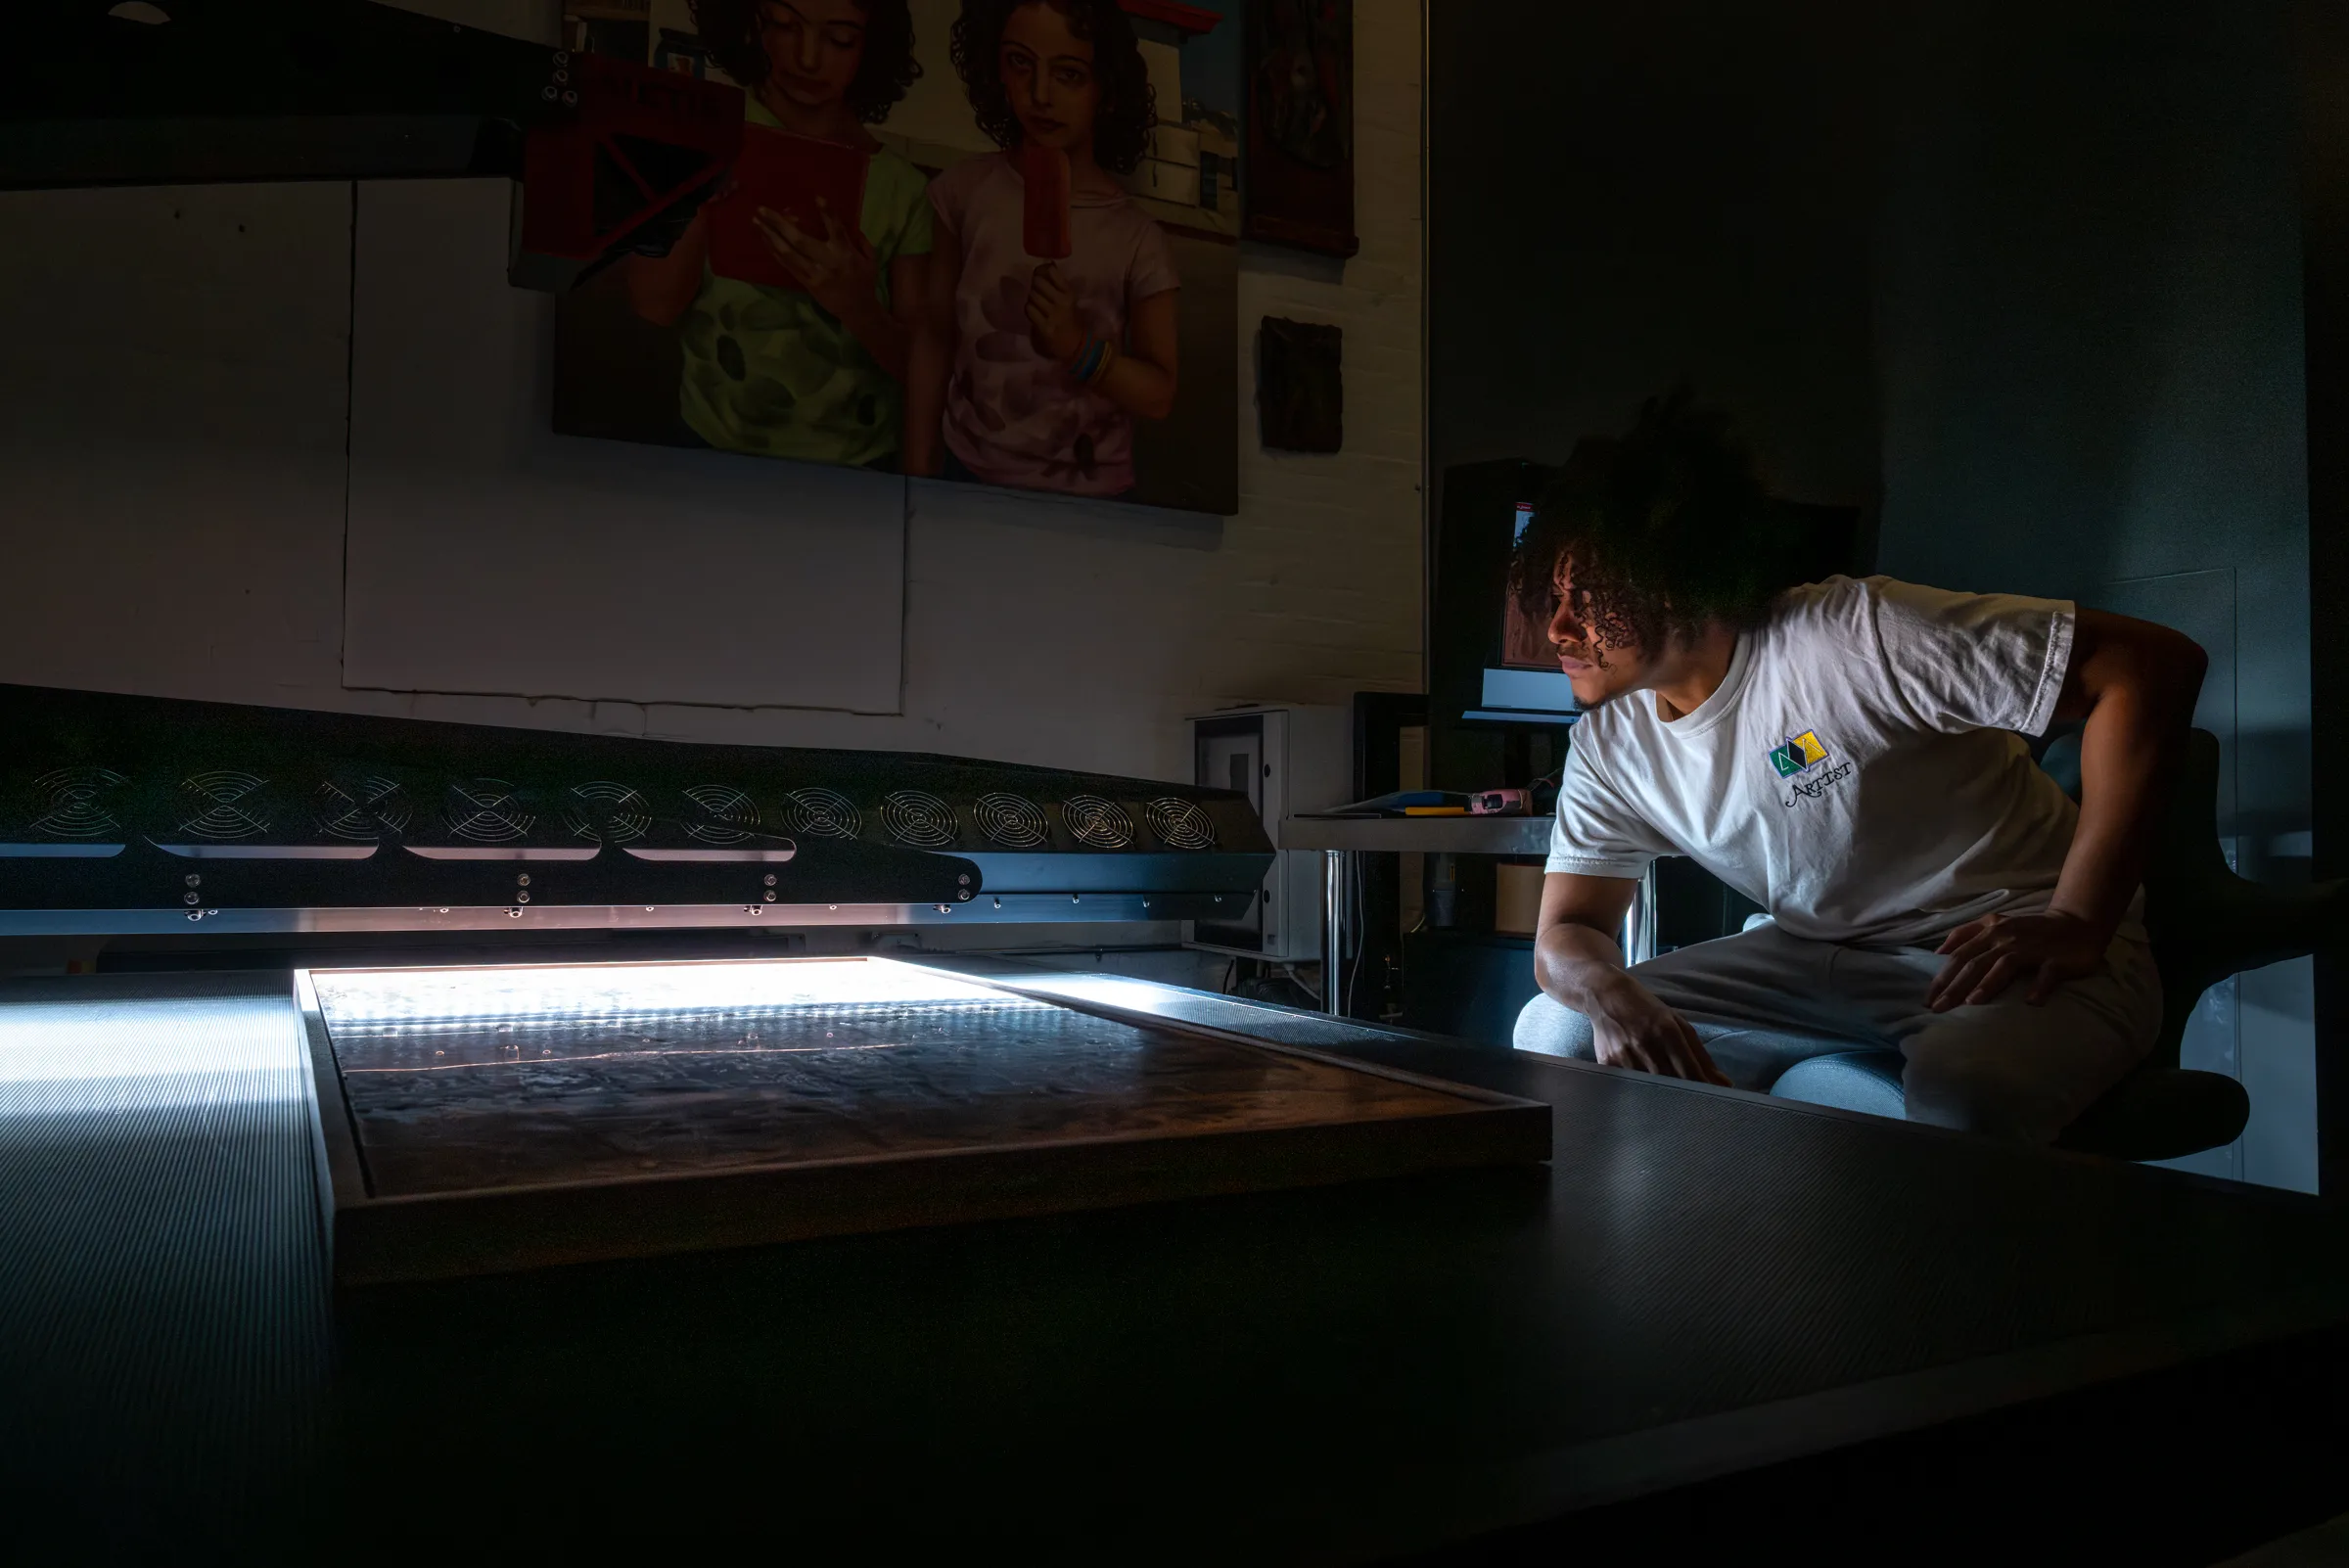
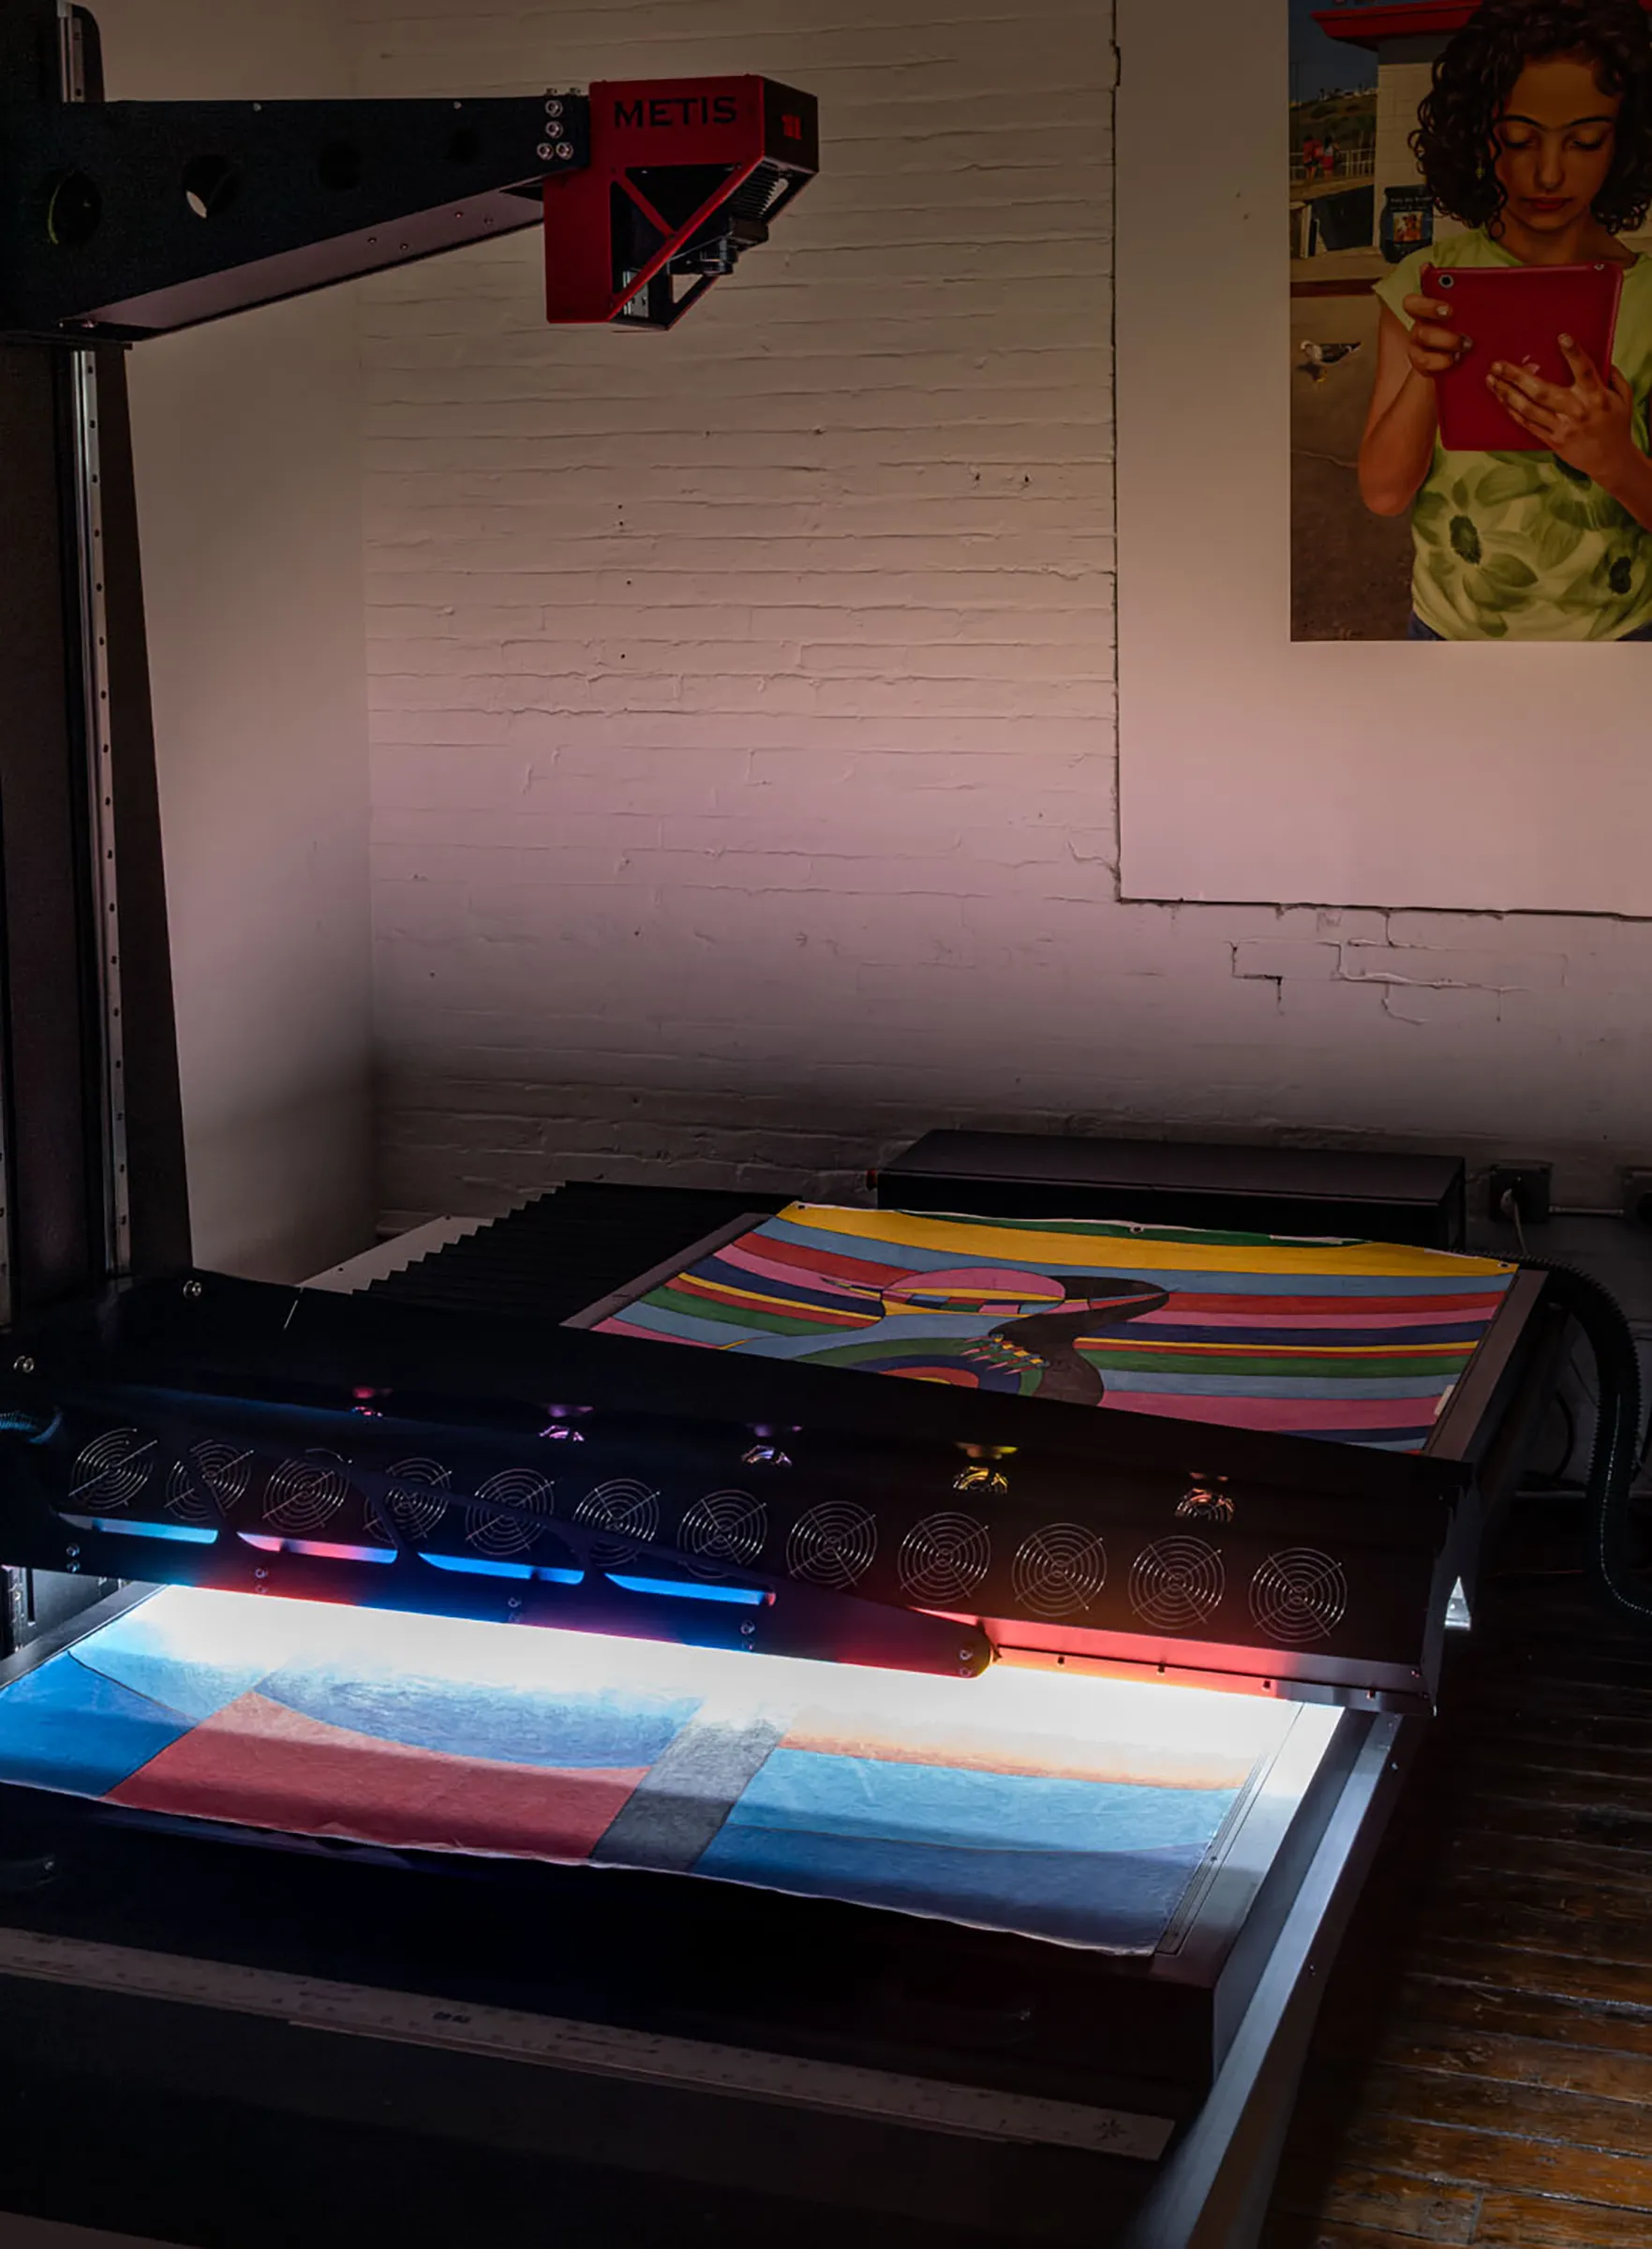
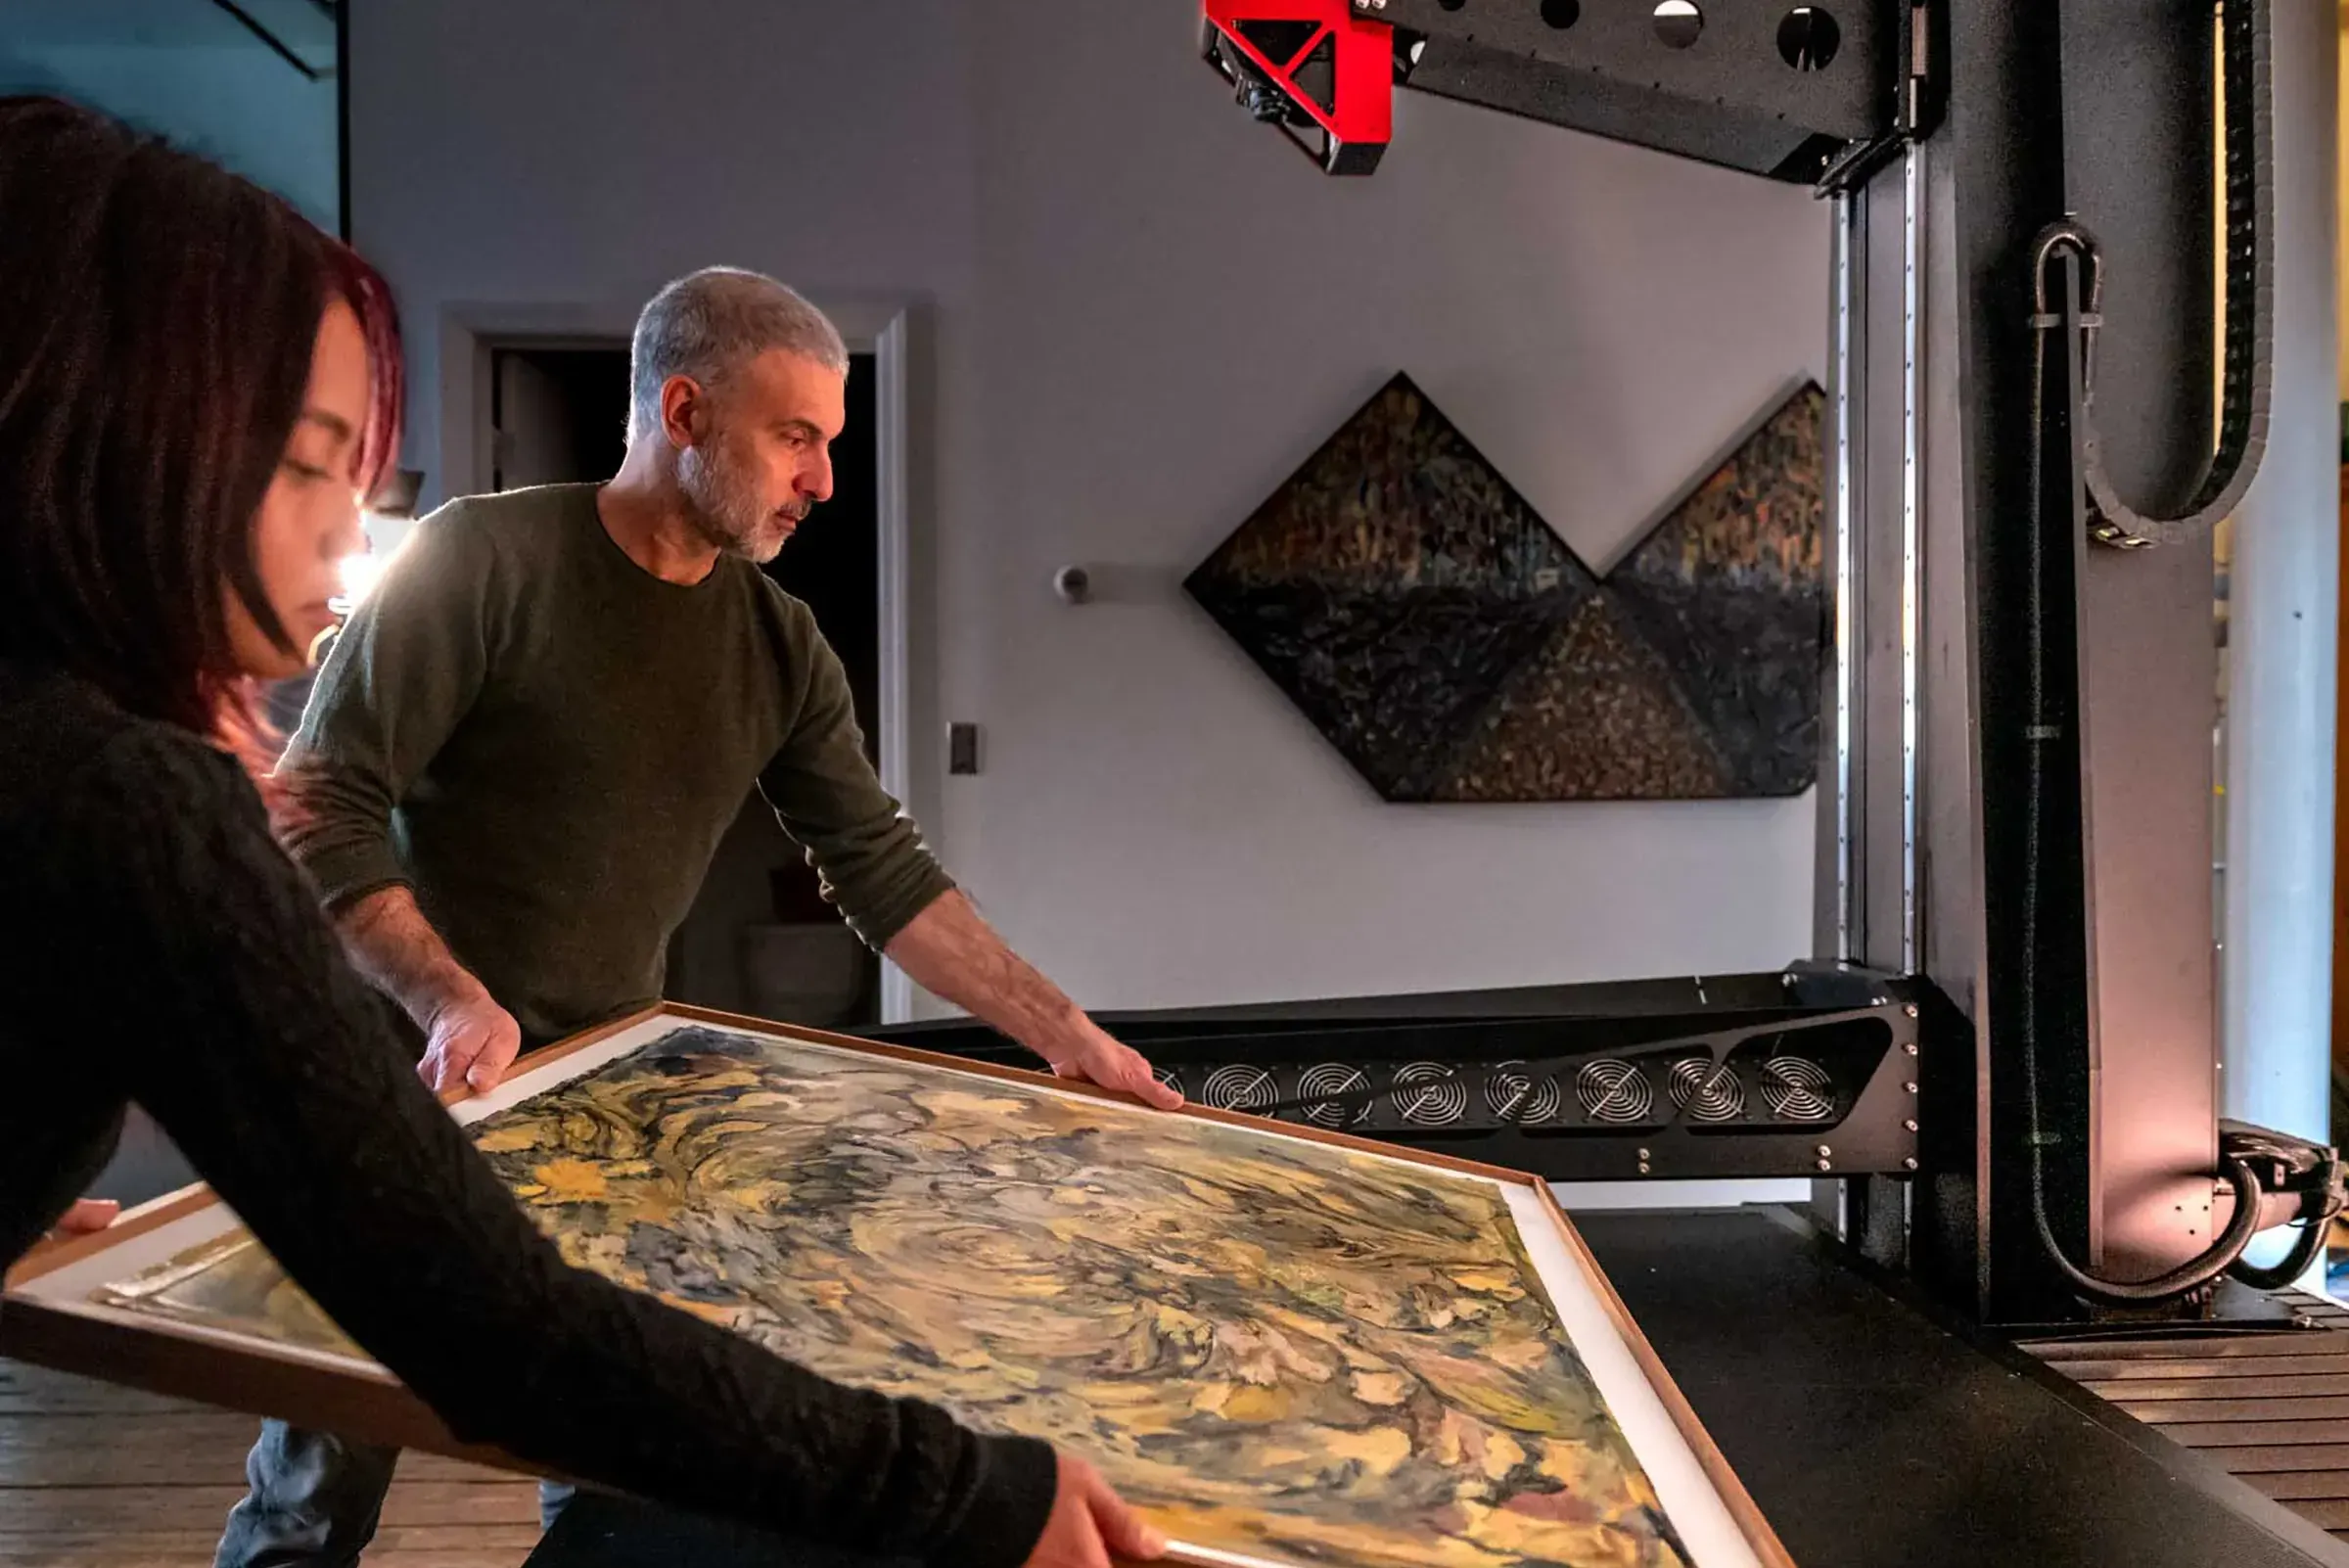
For most paintings and works on paper, the work should arrive unframed. While it is possible to scan framed works, the depth of frames and recessed mats can create shadows and limit the lighting options.
If the work is framed and deframing is impractical — the work is fragile, mounted under glass, or structurally attached to the frame — discuss this with the studio before the appointment. Professional large-format scanning systems can scan framed work through glass, managing reflections from the glass surface through lighting angle control. This is worth knowing about before you decide whether deframing is necessary.
Clean the Surface Before You Arrive
The precision of a professional scanner is one of its greatest strengths — and one thing that surprises many artists the first time they see their results: the scanner sees everything. Dust particles, loose hairs, fingerprints, and surface debris that are nearly invisible in normal lighting can appear clearly in a high-resolution scan, particularly on smooth or lightly textured surfaces where they cast small but visible shadows under directional lighting.
Before bringing work in, clean the surface as thoroughly as is safe for the medium. For most paintings, a gentle pass with a soft, clean brush or a blower removes loose dust and surface particles without any risk to the paint layer. For works on paper, a soft brush or careful use of compressed air handles loose debris. Avoid touching the surface directly with fingers — skin oils leave impressions that can show up under the scanner's lighting, particularly on smooth or matte surfaces.
The studio will give every piece a careful pass with compressed air before scanning, and occasionally a careful brush — but we will never physically touch the surface of the work unless specifically advised to do so. Stubborn debris, embedded dust, or surface contamination that can't be removed by air may show up in the scan and require retouching afterward. Retouching is always available, but it adds time and cost that a clean surface avoids entirely.
For unfixed charcoal, pastel, and graphite work, surface cleanliness carries an additional dimension: loose media particles that shed from the artwork contaminate the scanner bed and the surrounding studio environment, and cannot easily be cleaned from delicate equipment without risk. A scanner bed carrying particles from your work can transfer them to the next piece on the table.
For this reason, we ask that all friable media be fixed before the appointment — not only to protect your work, but out of consideration for other artists whose work will follow yours on the same equipment. If fixing is genuinely not possible for your work, please discuss this with the studio in advance so we can plan for appropriate isolation and handling. This may incur additional handling costs.
Make Sure the Work Is Fully Dry and Stable
This sounds obvious, but it's the most common preparation error: oil paintings must be fully cured, not just touch-dry. An oil painting that is dry to the touch at the surface may still have uncured paint layers beneath that could be affected by the scanner environment or handling. If you're uncertain whether the painting is fully cured, wait. The same applies to any other wet medium — varnish, encaustic, or watercolor washes applied recently. The work should be stable and not susceptible to any change from gentle handling.
For freshly varnished work, allow adequate curing time. Newly applied varnish can be tackier than it appears, and any contact with a scan surface — even a contactless scan where the artwork is not touched — involves the artwork resting on or near a surface that could trap airborne particles. While it is technically possible to scan a wet piece thanks to the contact-free process, the practicalities of handling and storing a wet work are significant. Special arrangements and related handling costs should be made clear in advance.
Fix Friable and Loose Media
Charcoal, graphite, soft pastel, and chalk-based media must be fixed before scanning. Unfixed media can smear, lift, or shed particles during handling — even with the care a professional studio applies. Fixative protects the work and the scanner. If you're uncertain about which fixative to use or whether your specific medium can be fixed safely, discuss it with the studio during consultation.
Soft pastel work in particular deserves advance discussion: some pastel artists prefer not to fix their work for aesthetic reasons, since fixative can alter the surface and color appearance. In these cases, the studio can advise on handling approaches that minimize risk while keeping the work unsprayed.
Handle Large Works with Care in Transit
Transport a large stretched canvas face-forward, supported at the stretcher bars rather than the canvas surface. Protect the corners of the stretcher — these are the most common impact points in transit. For works on paper or unstretched canvas, roll around a large-diameter tube (small-diameter rolling risks stress cracks in the paint layer) or transport flat between sheets of glassine and rigid boards. Never fold.
For high-value or particularly fragile works, professional art handling may be worth the investment. Art handlers have the materials and experience to move work safely. If shipping to the studio rather than delivering in person, contact the studio before sending — they can advise on packing and third-party art handlers and coordinate receipt. For more on oversized work, see our guide on how to scan a large painting.
What to Flag Before the Appointment
Certain characteristics of a work benefit from advance discussion — not because they prevent scanning, but because they require specific preparation or setup decisions that are better made before the work arrives than after.
- Varnish — type, sheen level, and whether it's freshly applied or long-cured. Varnished surfaces require specific lighting management.
- Metallic pigments, gold leaf, or foil — highly reflective areas that need careful lighting angle selection to prevent specular reflections from obscuring color and detail.
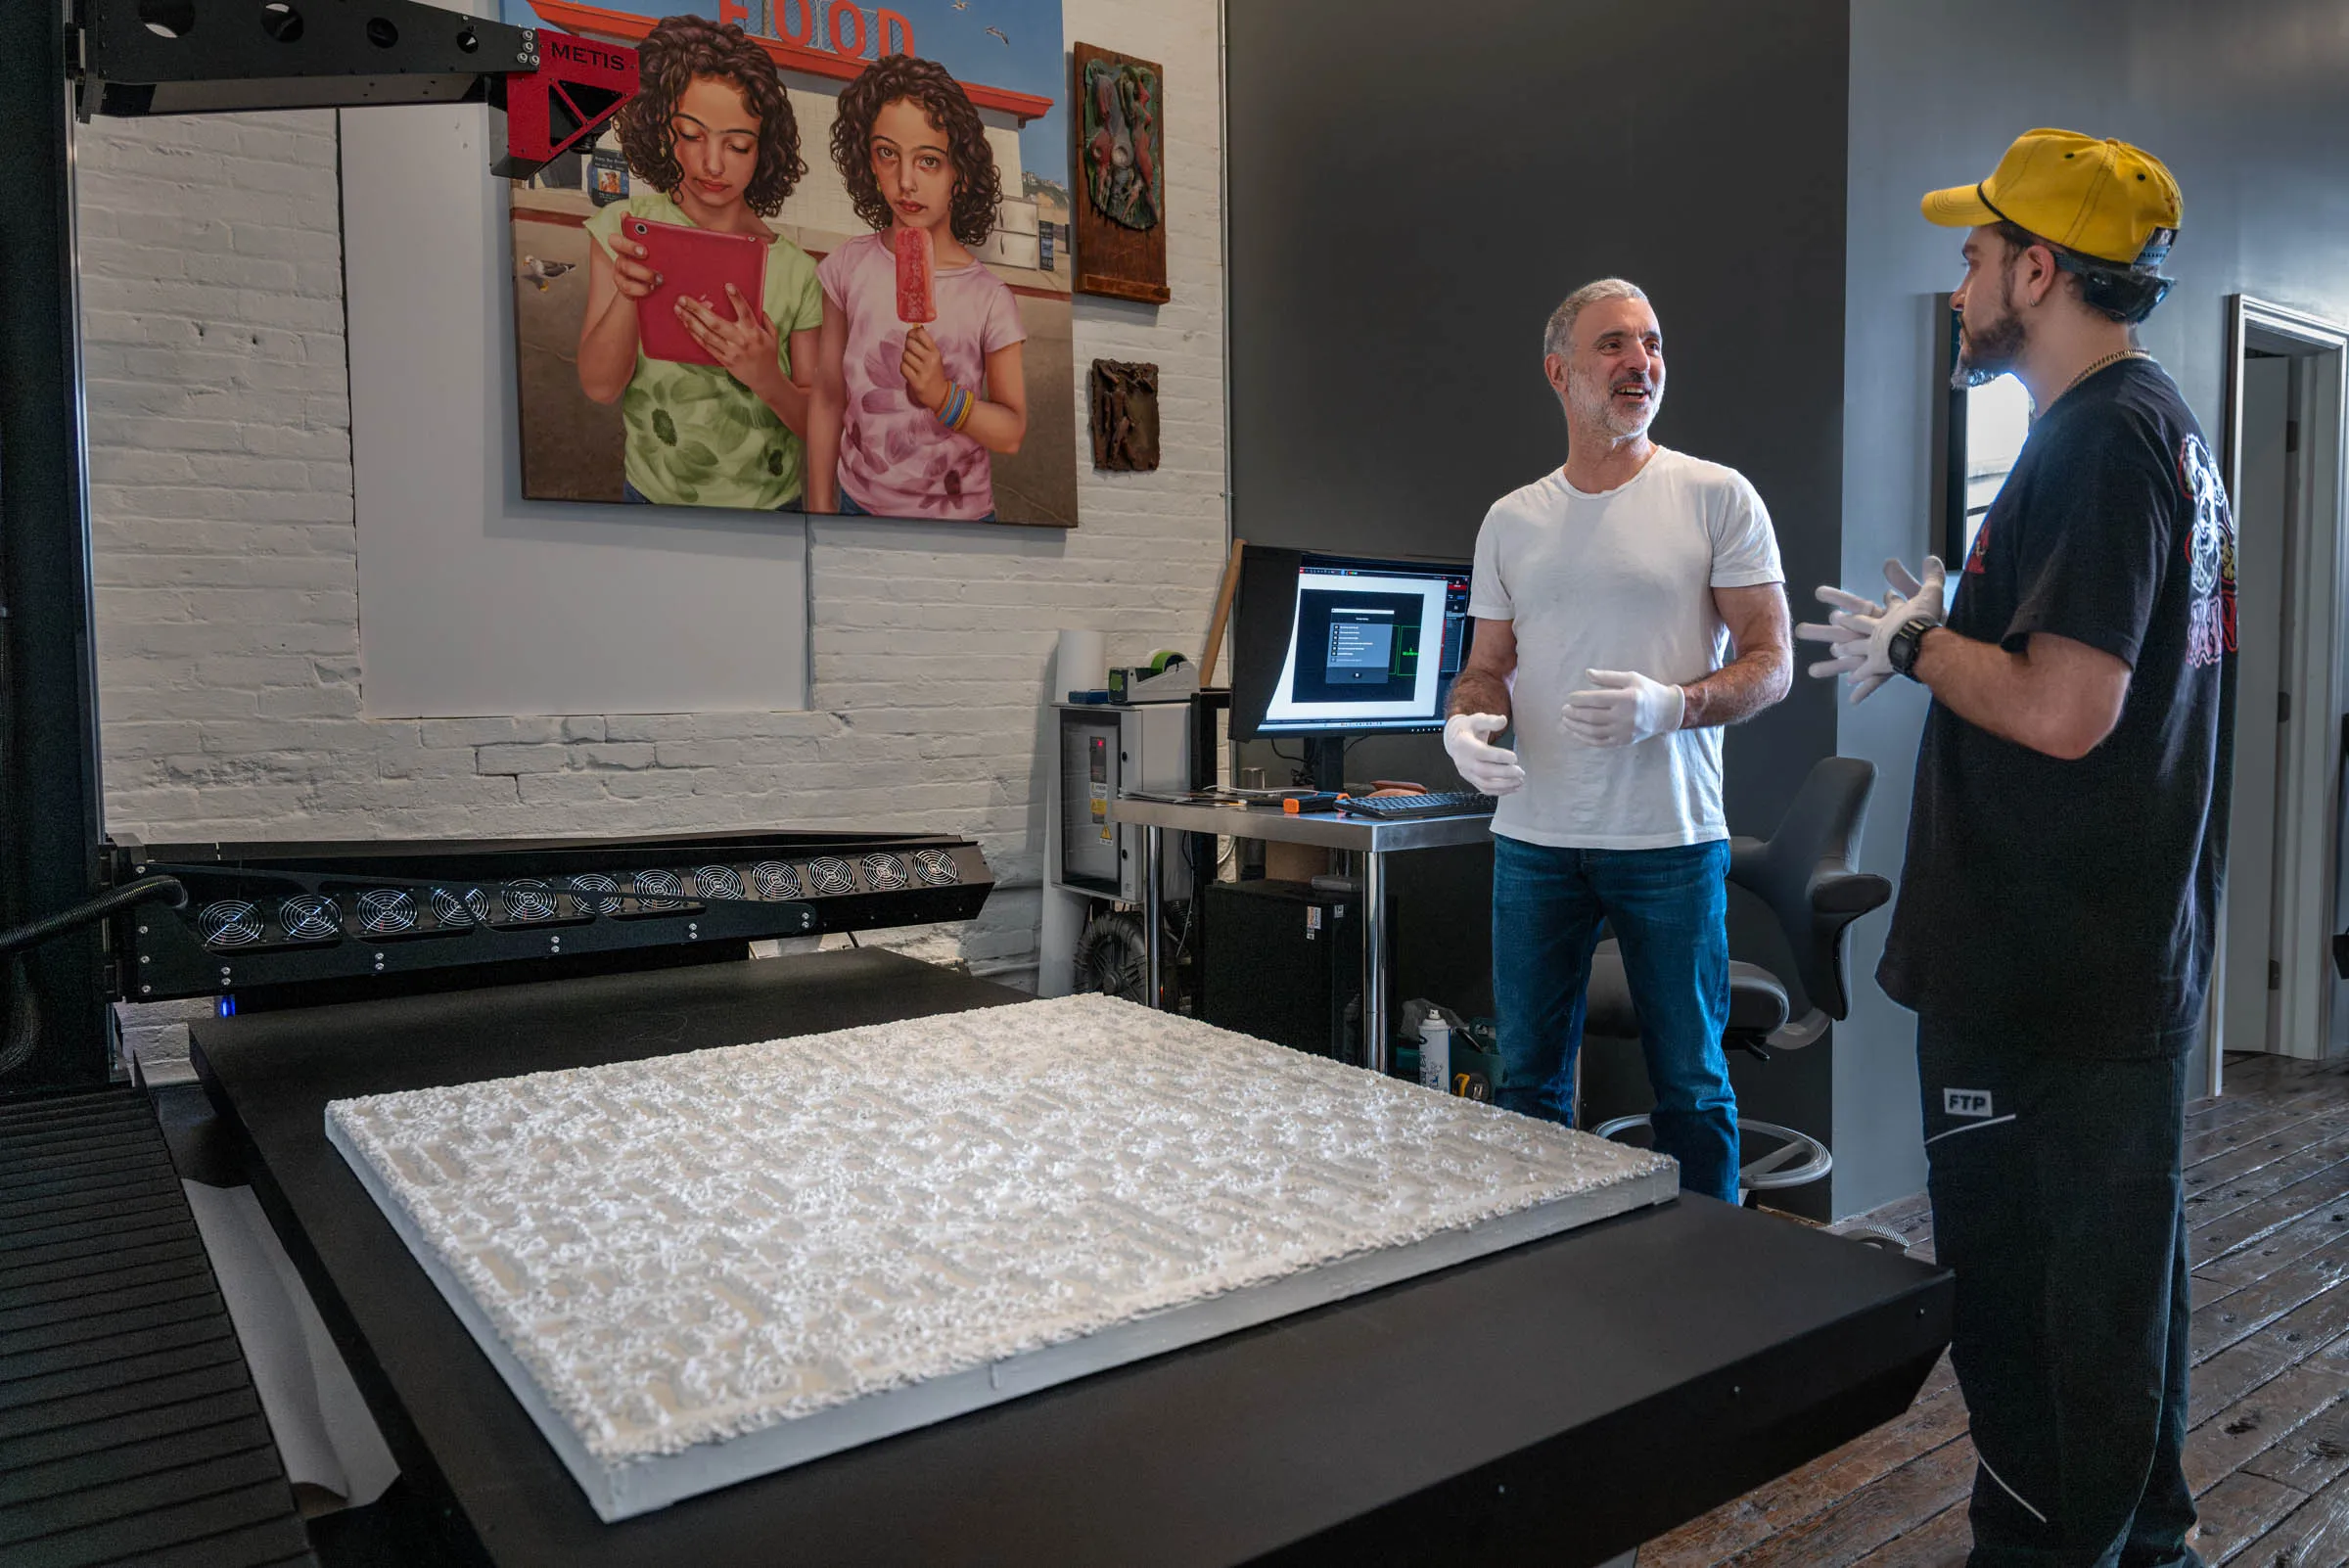
- Heavy impasto or raised media — significant surface relief that affects depth-of-field selection and may require specific lighting to render accurately.
- Fragile, flaking, or deteriorating surfaces — condition issues that affect how the work can be handled and positioned. These are never a reason not to scan — capturing a condition record before further deterioration is exactly what professional archival scanning exists for. But the studio needs to know in advance.
- Unstretched or rolled canvas — works that aren't on a rigid support need different handling on the scan table. Let the studio know.
- Mixed media with dimensional elements — collage with raised materials, assemblage elements, fabric, or found objects attached to the surface. The scanner can handle significant depth, but the studio needs to select the right depth-of-field setting for the specific work.
- Very large dimensions — if you're uncertain whether the work fits in a single pass on the studio's scanner, ask before bringing it in. Studios with stitching capability can handle virtually any size, but it's useful to confirm.
Preparation by Medium
Different media have different preparation requirements. The list below summarizes the key considerations for the most common artwork types.
- Oil painting (dry, unvarnished) — unframe and ensure fully cured. Advance discussion only if impasto, reflective areas, or an unusual surface.
- Oil painting (varnished) — unframe and note varnish type and age. Discuss in advance; varnish requires specific lighting management.
- Acrylic painting — unframe and ensure fully dry. Discuss if heavy texture, gel medium, or mixed elements.
- Watercolor / gouache — unframe or remove from mount if possible; ensure dry, best if flat. Discuss if very delicate paper or fragile condition.
- Charcoal / graphite — fix before arriving and unframe. Discuss if you prefer not to fix, so the studio can plan handling alternatives.
- Soft pastel — fix if acceptable and unframe. Discuss in advance; cover fixing preference and handling approach.
- Works on paper (general) — unframe or remove from mount; ensure flat. Discuss if fragile, torn, or deteriorating.
- Pen and ink / drawing — unframe and ensure dry. Discuss only if an unusual surface or metallic ink.
- Photographs (prints) — remove from frame and note surface type (gloss or matte). Discuss if mounted on heavy substrates that are warped.
- Textiles / tapestry — remove from display hardware if possible and lay flat. Discuss in advance; depth of field and lighting setup are specific to the work.
- Mixed media / collage — unframe and note all media types and any raised elements. Discuss in advance; dimensional elements need planning.
- Encaustic — ensure fully set and unframe. Discuss in advance; surface sensitivity and lighting are specific to wax surfaces.

Pre-Appointment Checklist
Before the consultation:
- Measure the work accurately — note dimensions including any borders or margins.
- Know the medium and surface characteristics.
- Decide on intended use: reproduction, archival, publication, or all of the above.
- Note any condition issues: fragility, flaking, active deterioration, damage.
- Note any challenging surfaces: varnish, metallic pigment, heavy texture, dimensional elements.
Before leaving your studio:
- Painting or work on paper is fully dry and stable — not touch-dry, fully cured.
- Surface has been gently cleaned: dust, debris, loose hairs, and fingerprints removed with a soft brush or compressed air.
- Avoid touching the surface with bare hands after cleaning — oils from skin show up in high-resolution scans.
- Charcoal, graphite, pastel, and chalk media are fixed — unfixed media contaminates the scanner bed.
- Work is unframed (or a framed scan is discussed and confirmed with the studio).
- Protective coverings (glassine, tissue) are removed.
- Large works are rolled on a wide-diameter tube or sandwiched flat — never folded.
- Corners and edges of stretched canvases are protected for transport.
On the day:
- Bring any reference material relevant to the scan: previous proofs, prints, comparable images.
- Know the largest print size you'll ever want from this file — important for resolution decisions.
- Know your delivery preference: digital download, physical drive, in-person pickup.
- Allow time for a brief review of the work with the operator before scanning begins.
Frequently Asked Questions
Does my painting need to be removed from the stretcher before scanning?
No — a stretched canvas on its stretcher bars can be scanned directly. The stretcher adds depth, which professional scanners accommodate within their depth-of-field range. Remove the painting from any outer frame when possible, but the canvas can remain on its stretcher. If it's in a closed frame, we can often scan through glass.
Can I scan a painting that still has wet areas?
No. The work must be fully dry and stable before scanning — not just touch-dry at the surface. For oil paintings, this means fully cured. If you're uncertain whether the painting is ready, wait, or contact the studio to discuss. Scanning a partially dry work risks damage.
Do I have to fix my charcoal or pastel drawing before scanning?
Charcoal and graphite must be fixed before scanning to prevent smearing or displacement during handling. For soft pastel, fixing is strongly recommended — but if you prefer not to fix for aesthetic reasons, discuss this with the studio during consultation. There are handling approaches that can reduce risk for unfixed work, though they involve more care and slower handling.
What if my painting is fragile or in poor condition?
Fragile or deteriorating works can almost always be scanned — and professional scanning is often exactly the right time to capture a condition record before further deterioration. Discuss the work's condition during consultation so the studio can plan appropriate handling. Contactless scanners pose no physical risk to the surface, and UV-free LED lighting poses no photosensitive risk. The goal is to capture as faithful a record as possible before anything changes.
My painting is very large. Do I need to do anything special?
Confirm the dimensions with the studio before your appointment — this determines whether single-pass capture is possible or whether multi-pass stitching is needed, and it affects the time and cost estimate. For large stretched canvases, no special preparation is needed beyond standard deframing. For oversized works on paper or unstretched canvas, discuss transport and handling with the studio in advance.
What information should I bring to the appointment?
Know the intended use of the file (reproduction, archival, publication), the largest print size you might ever want, and any specific technical requirements from a publisher or institution if relevant. If you have existing prints or proofs you want the scan to match, bring them — they're useful references for the color-correction step.
Professional Artwork Digitization at Brooklyn Editions
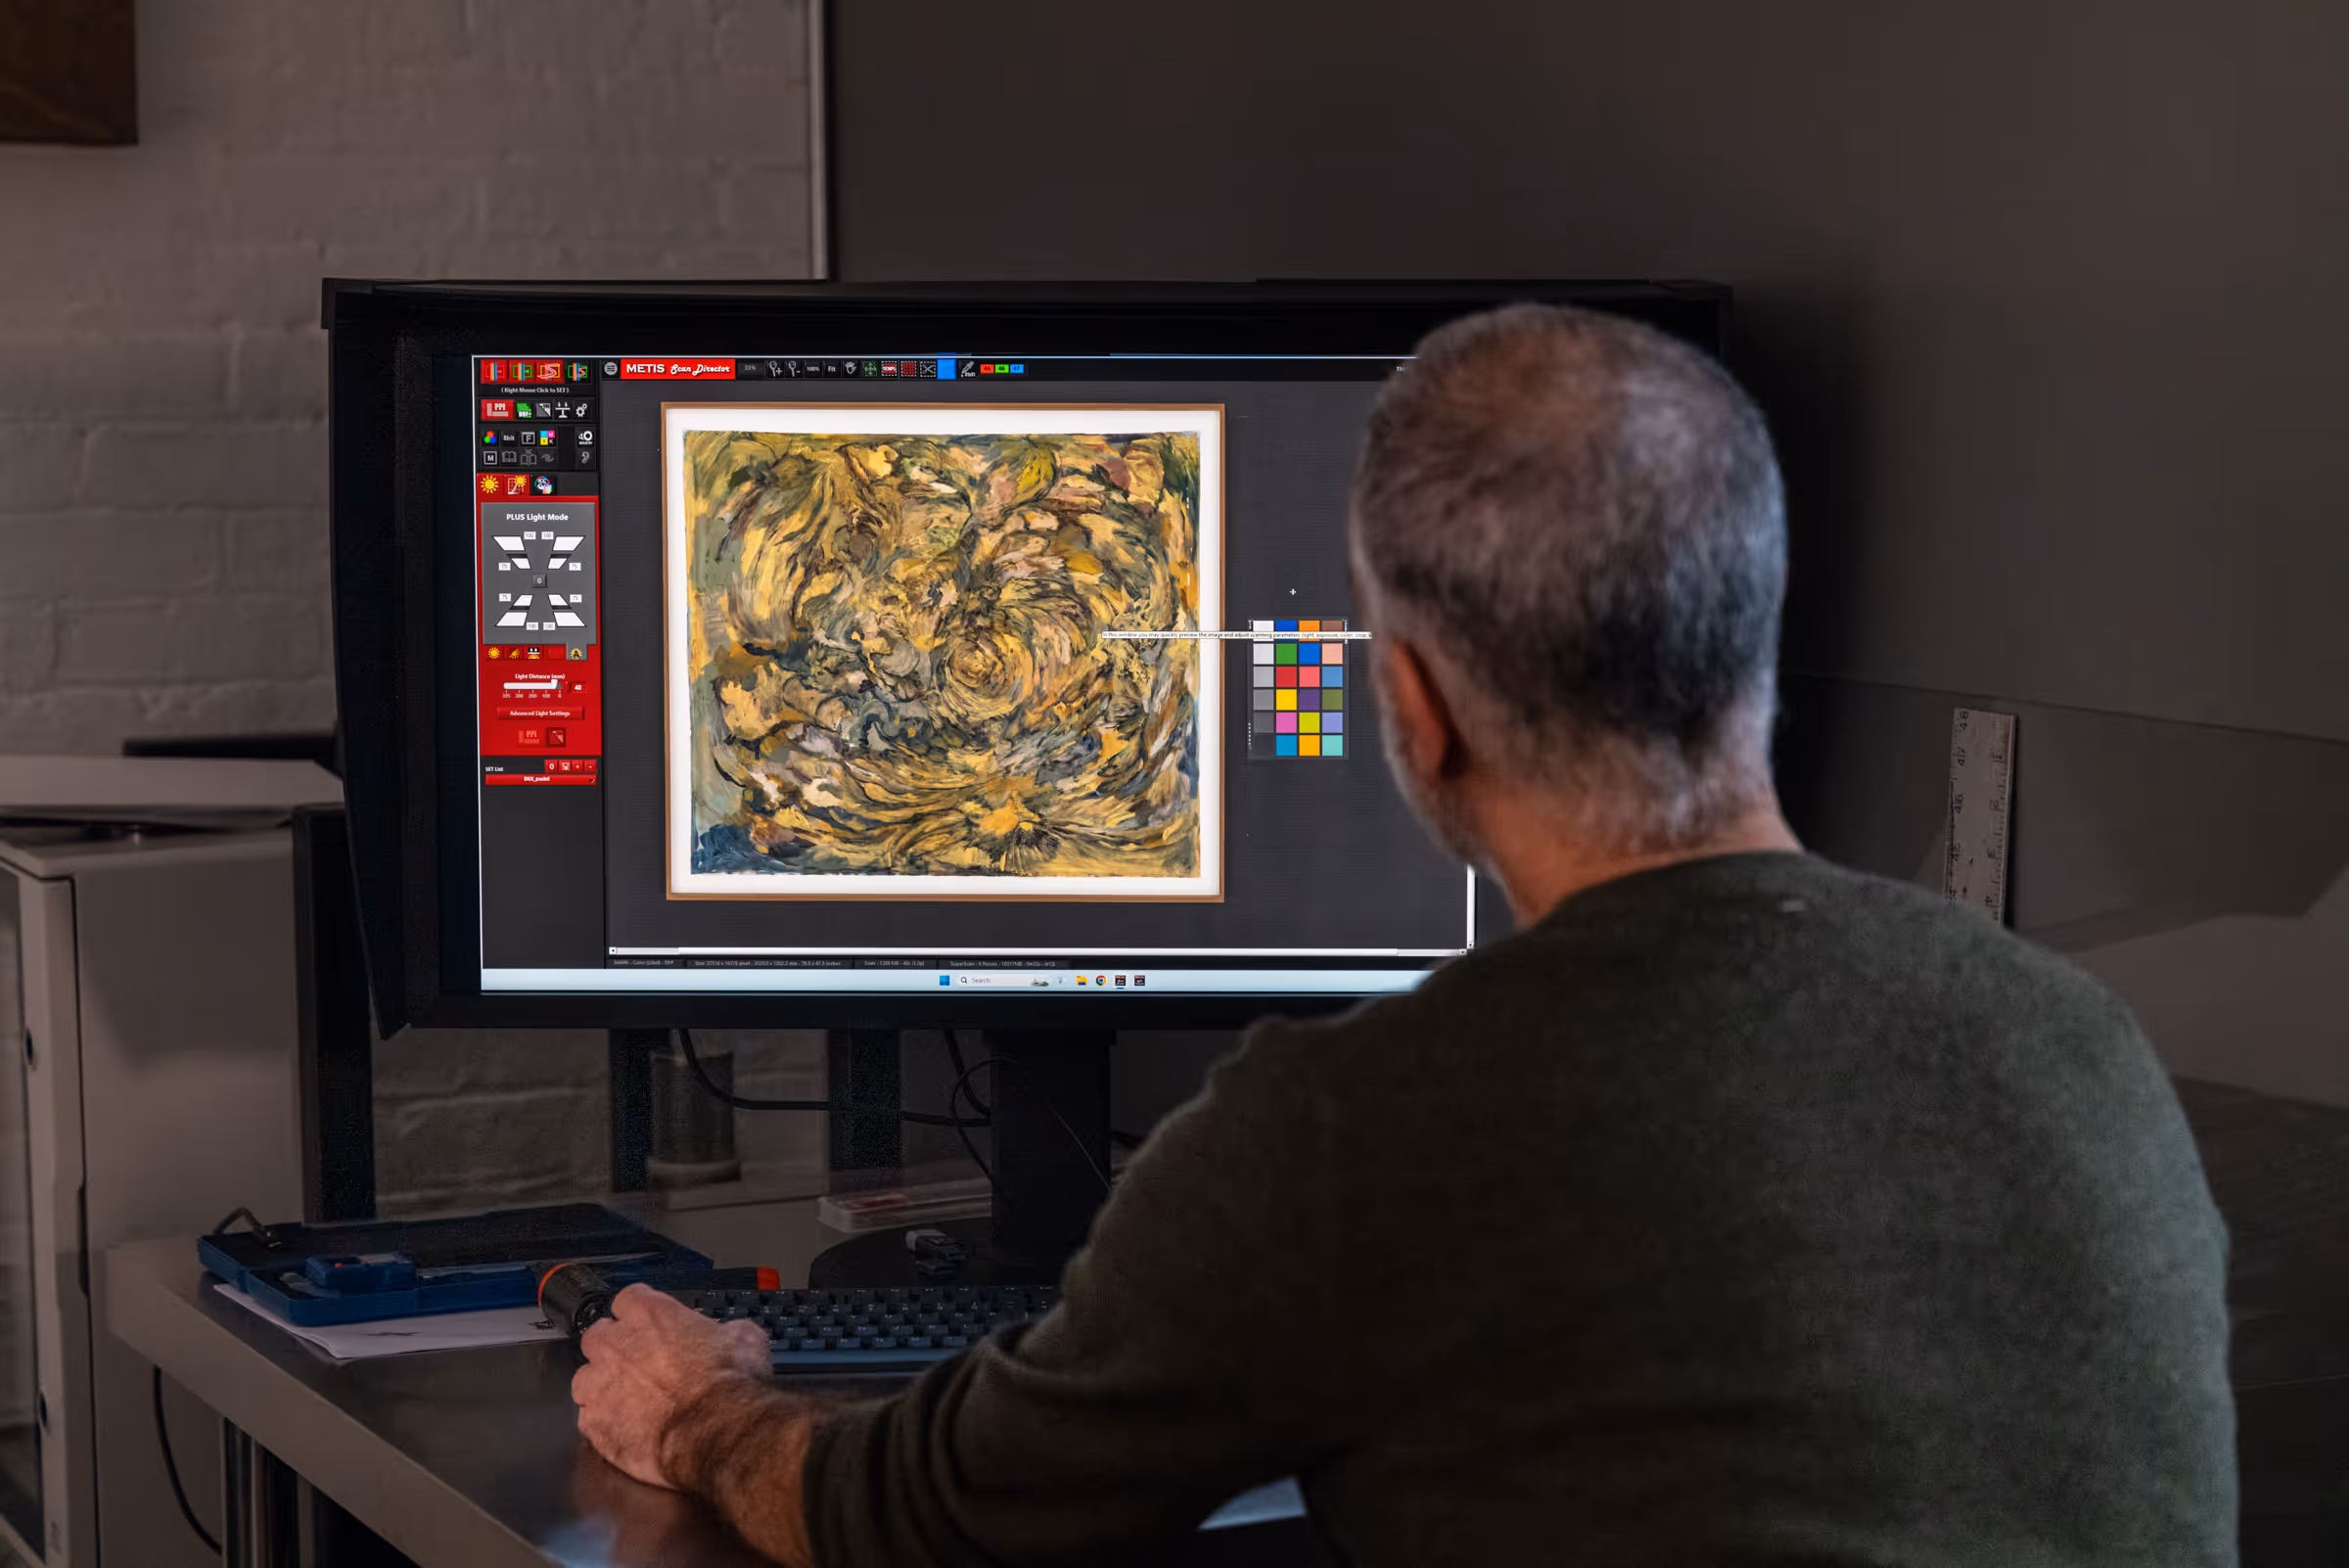
At Brooklyn Editions, artwork is digitized using the Metis DRS 2020 — a professional scanning system with a native optical resolution up to 1600 PPI and a scan bed capable of capturing large paintings in a single contactless pass. Every scan project begins with a consultation to discuss the artwork, its dimensions, and the intended use of the files, so that we can recommend the right resolution and workflow before any work begins.
If you're planning to reproduce artwork as prints, create an archival digital record, or produce an edition, our scanning services page has full details on the process, file delivery, and how to get started.